admin – Page 2 – Travel Move Kit

Author: admin

  • Best Credit Card for Japan Travel in 2026: A Practical Guide From Someone Who Lives Here

    Best Credit Card for Japan Travel in 2026: A Practical Guide From Someone Who Lives Here

    Affiliate Disclosure: This article contains affiliate links. If you sign up for a product or make a purchase through our links, we may earn a small commission at no extra cost to you. This helps us keep creating free, helpful content for people moving to and living in Japan. We only recommend products we genuinely believe in.

    💸
    Recommended Tool
    Wise — The Expat Standard for Money Transfers
    Wise uses the real mid-market exchange rate with low, transparent fees. Most expats in Japan use it for sending money home or paying bills. No hidden markups, no surprises.

    Open a Wise Account →Free to open · No monthly fees · Used by 16M+ people

    Introduction: Why Your Credit Card Choice Actually Matters in Japan

    Let me be real with you — Japan has a complicated relationship with credit cards. When I first moved here over a decade ago, I was stunned by how many places were cash-only. Fast forward to 2026, and things have improved dramatically, especially in major cities. But choosing the right credit card before you fly to Tokyo, Osaka, or Kyoto can literally save you hundreds of dollars and spare you from those awkward moments at a ramen counter when your card gets declined.

    Here’s the thing most travel blogs won’t tell you: not every credit card works well in Japan. Some cards charge brutal foreign transaction fees (typically 3% on every single purchase). Others have networks that aren’t widely accepted here. And some rewards programs are practically useless for Japan-bound travelers.

    I’ve tested dozens of cards during my years living in Japan, and I’ve helped countless friends and readers pick the right one before their trips. In this guide, I’ll walk you through the absolute best credit cards for Japan travel in 2026 — whether you’re coming for two weeks or planning a longer stay. I’ll cover which networks actually work here, how to avoid unnecessary fees, and which cards give you the best bang for your yen.

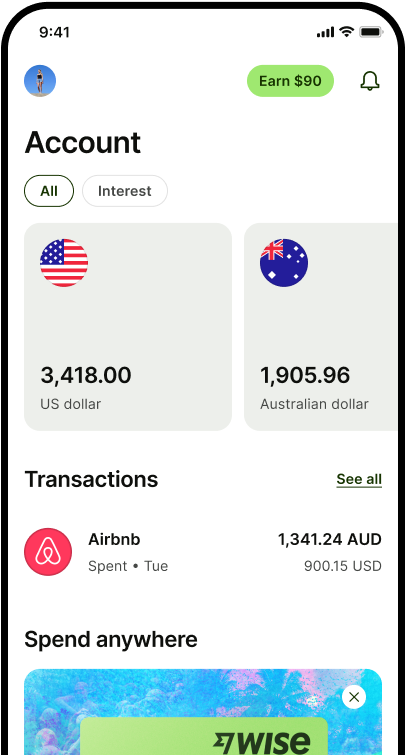
    If you’re also thinking about managing money long-term in Japan, check out our Wise Japan review for a great companion tool to any travel credit card.

    Quick Comparison: Top Credit Cards for Japan Travel in 2026

    Card Annual Fee Foreign Transaction Fee Best For Network
    Chase Sapphire Preferred® $95 None Overall best for Japan travel Visa
    Chase Sapphire Reserve® $550 None Premium travelers & lounge access Visa
    Capital One Venture X $395 None Flexible rewards + lounge access Visa
    Capital One Venture Rewards $95 None Simple flat-rate rewards Visa
    Bank of America® Travel Rewards $0 None Budget-conscious travelers Visa
    Bilt Mastercard $0 None Mastercard backup option Mastercard

    Chase Sapphire Preferred® — Best Overall for Japan Travel

    If I could only bring one credit card to Japan, this would be it. The Chase Sapphire Preferred has been my go-to recommendation for Japan travelers for years, and in 2026 it’s still the card to beat.

    Why? It runs on the Visa network, which is by far the most widely accepted international card network in Japan. Whether you’re tapping to pay at a convenience store in Shinjuku, buying a Shinkansen ticket at a JR station, or paying for a ryokan in rural Tohoku, Visa works almost everywhere that accepts cards.

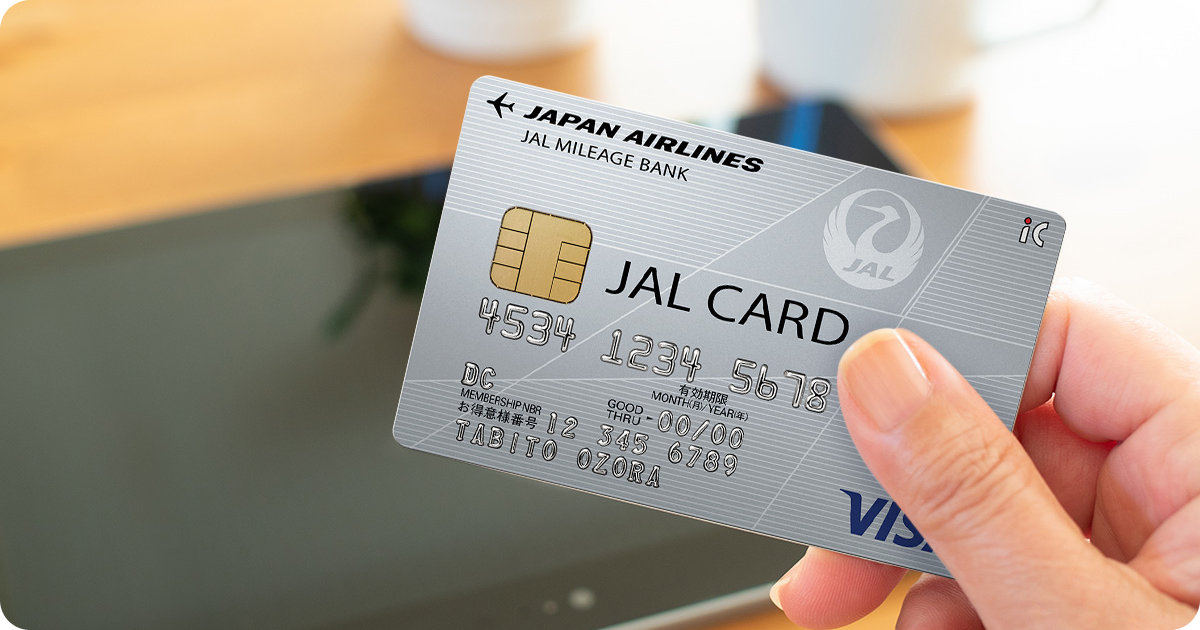
    The card earns 2x points on travel and dining — two categories you’ll be spending heavily in during a Japan trip. Those points are worth 25% more when you redeem them through Chase Travel℠, and they transfer 1:1 to airline and hotel partners like United, Hyatt, and ANA (All Nippon Airways). That ANA transfer partnership alone is gold for Japan travelers.

    Pros:

    • No foreign transaction fees
    • Visa network — most widely accepted in Japan
    • 2x points on travel and dining (your biggest Japan expenses)
    • 1:1 point transfers to ANA and other key partners
    • Strong travel insurance and purchase protection
    • Reasonable $95 annual fee

    Cons:

    • $95 annual fee (though easily offset by rewards)
    • No airport lounge access
    • Requires good to excellent credit

    Chase Sapphire Reserve® — Best Premium Card for Japan

    If you’re doing Japan in style — staying at nice hotels, eating at high-end restaurants, maybe flying business class on ANA — the Sapphire Reserve is worth the steeper annual fee. The $550 fee sounds intense, but you get a $300 annual travel credit that kicks in automatically, bringing the effective cost down to $250.

    You also get Priority Pass lounge access, which is genuinely useful at Narita, Haneda, Kansai, and other Japanese airports. After a 14-hour flight from the US, being able to decompress in a lounge before navigating Japanese train systems is a sanity saver.

    The card earns 3x points on travel and dining (compared to 2x on the Preferred), and points are worth 50% more through Chase Travel℠. It also comes with significantly better travel insurance, including trip delay coverage that’s saved me real money when typhoons disrupted my plans.

    Pros:

    • No foreign transaction fees
    • 3x points on travel and dining worldwide
    • $300 annual travel credit
    • Priority Pass airport lounge access (works at Japanese airports)
    • Excellent trip delay and cancellation insurance
    • 1:1 transfers to ANA, Hyatt, and 10+ other partners

    Cons:

    • $550 annual fee
    • Requires excellent credit
    • Overkill if you only travel to Japan once

    Capital One Venture X — Best for Flexible Rewards + Lounge Access

    The Capital One Venture X has quickly become one of my favorite alternatives to the Chase ecosystem. It earns 2x miles on everything (no category tracking needed), 10x on hotels and rental cars booked through Capital One Travel, and 5x on flights booked through Capital One Travel.

    The $395 annual fee comes with a $300 annual travel credit through Capital One Travel and 10,000 bonus miles every anniversary (worth $100), so the effective annual cost is basically nothing. You also get Capital One Lounge access and Priority Pass membership.

    It runs on the Visa network, which is crucial for Japan. And Capital One has transfer partners including ANA, which makes this a powerful card for booking award flights to Japan.

    Pros:

    • No foreign transaction fees
    • Visa network — works great in Japan
    • Effectively free after travel credits and anniversary bonus
    • Priority Pass and Capital One Lounge access
    • Transfer partners include ANA
    • Simple 2x earning on everything

    Cons:

    • $395 upfront annual fee before credits
    • Travel credits only work through Capital One Travel portal
    • Fewer transfer partners than Chase

    Capital One Venture Rewards — Best Mid-Range Option

    If you want simplicity without the premium price tag, the standard Capital One Venture Rewards card is a solid pick. It earns a flat 2x miles on every purchase, has no foreign transaction fees, and runs on Visa. For Japan travel, that straightforward earning structure means you don’t have to think about bonus categories — just tap and go.

    Miles can be redeemed as statement credits against travel purchases or transferred to airline partners. It’s less flashy than the premium options, but at $95 per year with no foreign transaction fees, it gets the job done reliably.

    Pros:

    • No foreign transaction fees
    • Simple 2x miles on all purchases
    • $95 annual fee
    • Visa network
    • Easy mile redemption

    Cons:

    • No lounge access
    • Fewer premium travel benefits
    • $95 fee may not suit infrequent travelers

    Bank of America® Travel Rewards — Best No-Annual-Fee Option

    On a budget? The Bank of America Travel Rewards card is the best no-annual-fee option for Japan travel. It earns 1.5 points per dollar on everything, has zero foreign transaction fees, and runs on Visa. If you’re a Bank of America Preferred Rewards member, you can earn up to 2.62 points per dollar, which is competitive with premium cards.

    This card won’t win any awards for flashy perks, but if you just want a reliable card that won’t charge you extra every time you buy an onigiri at 7-Eleven, it does exactly that.

    Pros:

    • No annual fee
    • No foreign transaction fees
    • Visa network
    • Bonus earning potential for BoA banking customers
    • Simple redemption

    Cons:

    • Lower base earning rate (1.5x)
    • No premium travel benefits
    • No transfer partners

    Bilt Mastercard — Best Backup Card (Mastercard Network)

    Here’s a pro tip from someone who’s lived in Japan for years: always carry a backup card on a different network. While Visa is king in Japan, Mastercard is the second most accepted international network, and there are rare occasions where one works and the other doesn’t.

    The Bilt Mastercard is my recommended Mastercard backup. It has no annual fee, no foreign transaction fees, and earns points that transfer to major airline and hotel partners (including ANA). The unique selling point is that you can earn points on rent payments, but for Japan travel, its value is as a zero-fee Mastercard backup with solid transfer partners.

    Pros:

    • No annual fee
    • No foreign transaction fees
    • Mastercard network (useful backup to Visa)
    • Transfer partners include ANA and Hyatt

    Cons:

    • Must make 5 transactions per month to earn points
    • Mastercard less widely accepted than Visa in Japan
    • Not ideal as your primary card for Japan

    Buying Guide: How to Choose the Right Card for Your Japan Trip

    1. Prioritize the Visa Network

    This is the single most important piece of advice I can give you. In Japan, Visa has the widest acceptance among international card networks. American Express works at many larger merchants but is hit-or-miss at smaller shops and restaurants. Discover has a partnership with JCB (Japan’s domestic network), which can be useful, but Visa remains the safest bet. Always make your primary card a Visa.

    2. Zero Foreign Transaction Fees Are Non-Negotiable

    A 3% foreign transaction fee adds up fast. On a two-week trip where you charge $3,000 to your card, that’s $90 wasted. Every card on this list charges zero foreign transaction fees. Don’t settle for anything else.

    3. Understand Japan’s Cash Culture (It’s Changing, But…)

    Japan in 2026 is far more card-friendly than even a few years ago. Major convenience stores (7-Eleven, FamilyMart, Lawson), department stores, chain restaurants, train stations, and hotels all accept credit cards. Contactless payments (tap-to-pay) are increasingly common. However, some small ramen shops, izakayas, shrines, temples, and rural businesses remain cash-only. Always carry some yen — I recommend ¥20,000-30,000 as a baseline. You can use your credit card at 7-Eleven ATMs (which accept international cards) to withdraw cash when needed.

    For a more detailed breakdown on managing money, including getting yen at good rates, our Wise Japan review covers how to combine Wise with your credit cards for maximum savings.

    4. Set Up Contactless Payments Before You Go

    Add your credit card to Apple Pay or Google Pay before landing in Japan. Contactless payments are everywhere here — convenience stores, vending machines, train station kiosks, and many restaurants. It’s faster than inserting your card and avoids the occasional chip-reader compatibility issue I’ve seen with some foreign cards.

    5. Always Pay in Yen (Decline Dynamic Currency Conversion)

    When paying with a foreign credit card in Japan, some terminals will ask if you want to pay in your home currency (USD, EUR, etc.) or Japanese yen. Always choose yen. If you choose your home currency, the merchant or their payment processor sets the exchange rate — and it’s always worse. Let your credit card’s network (Visa, Mastercard) handle the conversion; they use wholesale exchange rates that are much more favorable.

    6. Notify Your Bank (Yes, Still)

    In 2026, most major banks have smart fraud detection that recognizes travel patterns, but I still recommend setting a travel notice through your bank’s app before departing. The last thing you want is your card frozen while you’re trying to check into a hotel in Kyoto at midnight after a long day of travel.

    7. Consider Your Travel Style

    • Budget backpacker: Bank of America Travel Rewards (no annual fee, no foreign transaction fees)
    • Mid-range traveler: Chase Sapphire Preferred (best rewards value at $95/year)
    • Luxury traveler: Chase Sapphire Reserve or Capital One Venture X (lounge access, premium insurance, higher earning rates)
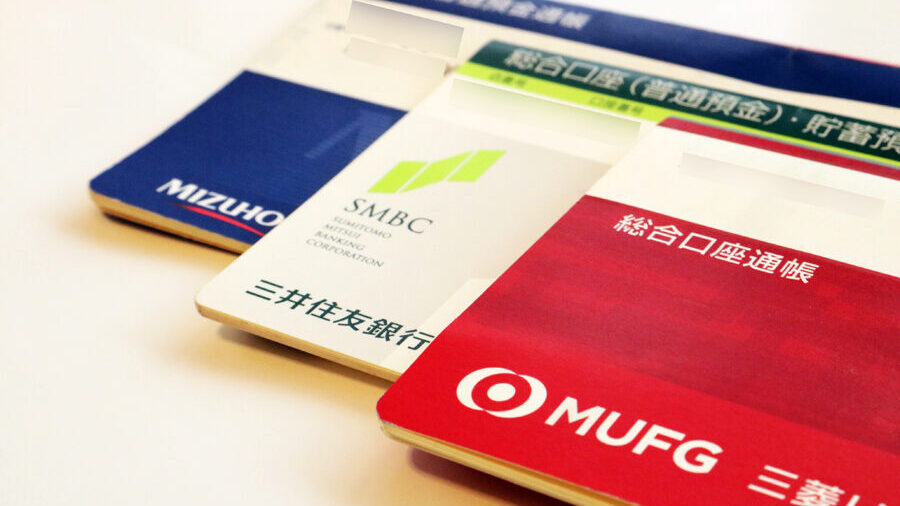
    • Planning to move to Japan: Get a no-foreign-transaction-fee card now, then look into Japanese bank accounts and cards after you arrive. Our moving to Japan checklist covers the financial setup process in detail.

    8. Bring a Physical Backup

    Japan still has many payment terminals that require a physical card insertion (chip readers). While contactless is growing rapidly, don’t rely solely on your phone. Bring at least two physical cards — ideally one Visa and one Mastercard — stored in separate locations in case of loss or theft.

    Frequently Asked Questions

    Can I use credit cards everywhere in Japan in 2026?

    Not quite everywhere, but it’s gotten dramatically better. Major chains, convenience stores, department stores, hotels, train stations, and most restaurants in cities accept credit cards. Contactless payments (tap-to-pay) are widely available. However, some small independent restaurants, street food vendors, traditional ryokans, temples, and rural businesses are still cash-only. I’d estimate that in Tokyo and Osaka, you can use cards about 85-90% of the time. In rural areas, drop that to 50-60%. Always carry some cash as backup.

    Which card network works best in Japan — Visa, Mastercard, or Amex?

    Visa is the clear winner for foreign travelers in Japan. It has the widest acceptance among international networks. Mastercard is a solid second choice. American Express works at larger merchants and hotels but is frequently not accepted at smaller businesses. Discover has a partnership with JCB (Japan’s domestic network), which gives it surprisingly decent coverage, but I still wouldn’t rely on it as a primary card. My recommendation: primary Visa, backup Mastercard.

    Should I get cash before going to Japan or withdraw it there?

    Withdraw it in Japan. Airport currency exchange counters (both in the US and Japan) offer terrible rates. Instead, land in Japan and head to any 7-Eleven ATM — they all accept foreign Visa and Mastercard debit/credit cards and dispense yen. The fees are minimal (typically a flat fee of a few hundred yen), and the exchange rate from your card network will be far better than any currency exchange booth. You can also use Japan Post Bank ATMs, which are found in post offices nationwide. I recommend withdrawing ¥20,000-30,000 to start and replenishing as needed.

    Do I need a PIN for my credit card in Japan?

    Most credit card transactions in Japan require a signature or are processed as contactless (no verification needed for small amounts). However, some ATMs and automated kiosks may ask for a PIN. Make sure you know your credit card’s PIN before traveling — call your issuer if you’re not sure. For cash withdrawals at ATMs, you’ll definitely need your debit card’s PIN. Set this up well before your trip.

    Is it worth getting a travel credit card just for a Japan trip?

    Absolutely, especially if you’re currently using a card that charges foreign transaction fees. Even on a modest two-week trip, you’ll likely charge $2,000-5,000 to your card between hotels, dining, transportation, and shopping. At a 3% foreign transaction fee, that’s $60-$150 in unnecessary charges. A no-annual-fee card like the Bank of America Travel Rewards pays for itself immediately (since it costs nothing). And if you pick up the Chase Sapphire Preferred, the sign-up bonus alone can be worth $600+ in travel, easily covering the $95 annual fee many times over.

    Conclusion: My Top Pick and Final Advice

    After ten years of living in Japan and helping hundreds of travelers and soon-to-be expats prepare for their trips, my top recommendation remains the

    Try Wise — Better Than Most Credit Cards →

    Hold JPY, AUD, USD and more. Spend at the real exchange rate.

    Affiliate link — we may earn a commission at no extra cost to you.

    📋
    Get the Free Moving to Japan Checklist
    Visas, banking, health insurance, apartments — the full guide for expats, delivered to your inbox.


  • How to Open a Bank Account in Japan: The Complete 2026 Guide for Foreigners

    How to Open a Bank Account in Japan: The Complete 2026 Guide for Foreigners

    In This Guide

    💸
    Recommended Tool
    Wise — The Expat Standard for Money Transfers
    Wise uses the real mid-market exchange rate with low, transparent fees. Most expats in Japan use it for sending money home or paying bills. No hidden markups, no surprises.

    Open a Wise Account →Free to open · No monthly fees · Used by 16M+ people

    Introduction: Why Opening a Japanese Bank Account Feels So Complicated (But Doesn’t Have to Be)

    Let me take you back to my first week in Japan. I’d just landed, jet-lagged out of my mind, clutching a folder of documents I thought were everything I needed. I walked into a bank branch near my apartment in Tokyo, took a number, sat down, and proceeded to have the most confusing 45 minutes of my life. The forms were in Japanese. The staff spoke limited English. And after all that? I was told I needed to wait six months before I could even open an account.

    That was over a decade ago, and thankfully, things have changed — a lot. In 2026, foreigners have more options than ever for banking in Japan, from traditional Japanese banks that have modernized their processes to fintech solutions that let you manage money from your phone in English. But the process can still trip you up if you don’t know what to expect.

    Whether you’re moving to Japan for work, study, or you’ve just arrived and need somewhere to put your yen, this guide walks you through everything — the banks worth considering, the documents you’ll need, the gotchas nobody warns you about, and the workarounds that actually work. I’ve helped dozens of friends and readers navigate this process, and I’m going to share every bit of that knowledge here.

    Before we dive into banking specifics, make sure you’ve covered the basics on your moving to Japan checklist — having your residence card sorted is the single most important prerequisite for everything that follows.

    Best Banks for Foreigners in Japan: My Top Recommendations for 2026

    Not all Japanese banks are created equal when it comes to foreigner-friendliness. After years of testing, switching, and helping others set up accounts, here are the banks I consistently recommend, broken down by what kind of expat you are.

    Bank English Support Online Banking in English Wait Period for New Residents Best For
    Sony Bank Full English Yes None (with residence card) Long-term expats, multi-currency needs
    Shinsei Bank (SBI Shinsei) Full English Yes None (with residence card) English speakers, easy ATM access
    Japan Post Bank (Yucho) Limited Partial Usually none Rural areas, students, immediate access
    MUFG Bank Some branches Partial 6+ months (sometimes waived) Corporate employees, salary accounts
    Wise (Borderless Account) Full English Yes (app-based) None International transfers, freelancers

    Sony Bank: The Best Overall Choice for English-Speaking Expats

    If I could only recommend one bank to a foreigner moving to Japan in 2026, it would be Sony Bank. Yes, the same Sony that makes PlayStations also runs a bank — and it’s genuinely excellent.

    Sony Bank offers a fully English online banking interface, a debit card (Sony Bank WALLET) that works internationally, and multi-currency accounts that let you hold dollars, euros, and other currencies alongside your yen. The application process can be completed online, and they’ve been consistently welcoming to foreign residents.

    Pros:

    • Complete English online banking and customer support
    • Multi-currency accounts — perfect if you still earn or receive money in your home currency
    • Sony Bank WALLET Visa debit card with favorable exchange rates
    • No monthly maintenance fees
    • Online application process (no branch visit needed)

    Cons:

    • No physical branches — everything is online or by phone
    • Application process can take 1-2 weeks for card delivery
    • Some features require Japanese reading ability for initial setup forms
    • ATM free withdrawals limited to certain networks and times

    My take: I switched to Sony Bank as my primary account three years ago and haven’t looked back. The multi-currency feature alone saves me thousands of yen per year on exchange fees. If you’re comfortable with online-only banking, this is the one.

    SBI Shinsei Bank: The Runner-Up with Great ATM Access

    SBI Shinsei Bank (formerly just Shinsei Bank) has been the go-to recommendation for foreigners in Japan for years, and for good reason. They were one of the first Japanese banks to offer full English support, and they continue to be one of the most foreigner-friendly options available.

    Pros:

    • Full English online banking, app, and phone support
    • Free ATM withdrawals at convenience store ATMs (depending on account tier)
    • No minimum balance requirements
    • Physical branches in major cities if you need in-person help
    • PowerFlex account is easy to open with just a residence card

    Cons:

    • Branch network is smaller than mega-banks
    • Some advanced investment features only in Japanese
    • Debit card options less competitive than Sony Bank’s
    • Customer tier system can be confusing at first

    My take: Shinsei was my first real bank account in Japan, and I still keep it active. The convenience store ATM access is a huge perk — you can withdraw cash at virtually any 7-Eleven, Lawson, or FamilyMart in the country. If you want a safety net of physical branches plus solid English support, Shinsei is your best bet.

    Japan Post Bank (Yucho Ginko): The Practical Choice for Immediate Access

    Japan Post Bank operates out of post offices, which means they’re literally everywhere — even in tiny rural towns where no other bank exists. This makes them the default choice for many newcomers, especially students and JET Programme participants.

    Pros:

    • Branches in virtually every neighborhood in Japan (over 24,000 locations)
    • Often willing to open accounts for new arrivals without a waiting period
    • Passbook-based system is simple and tangible
    • Many employers and landlords prefer Yucho for salary deposits and rent payments
    • Free transfers between Yucho accounts

    Cons:

    • Very limited English support — expect the process to be mostly in Japanese
    • Online banking interface is clunky and mostly Japanese
    • International transfers are complicated and expensive
    • Cash card (not a debit card) — limited to ATM use
    • Deposit limits compared to regular banks

    My take: I recommend Japan Post Bank as a secondary account or as your first account if you’re in a rural area where other banks aren’t accessible. It’s great for domestic transactions — paying rent, receiving salary, splitting bills with roommates — but you’ll want something else for international money management. Many expats end up with both a Yucho account and an online bank like Sony or Shinsei.

    MUFG, SMBC, and Mizuho: The Japanese Mega-Banks

    Japan’s three mega-banks — MUFG (Mitsubishi UFJ), SMBC (Sumitomo Mitsui), and Mizuho — are the banking equivalent of the big three automakers. They’re massive, they’re everywhere, and they’re deeply embedded in Japanese corporate life. Your employer might require you to have an account at one of these for salary payments.

    Pros:

    • Extensive branch and ATM networks nationwide
    • Required by some employers for salary deposits
    • Full range of financial services (loans, credit cards, investments)
    • Some branches have English-speaking staff (mainly in Tokyo, Osaka, Nagoya)

    Cons:

    • Many branches enforce the six-month residency rule for foreigners
    • English online banking is limited or nonexistent for most services
    • Bureaucratic and slow account opening process
    • ATM fees outside of banking hours (yes, Japanese ATMs have business hours)
    • Can be unwelcoming to foreigners at some branches — experiences vary wildly

    My take: If your company tells you to open a MUFG account, do it — but don’t make it your primary account for personal banking. The English support simply isn’t there yet for most everyday needs. I maintain a MUFG account purely because my landlord’s management company insists on it for rent auto-deductions.

    Wise: The Essential Companion for International Money Transfers

    Wise (formerly TransferWise) isn’t technically a Japanese bank, but it deserves a spot on this list because it solves the single biggest pain point for expats: moving money between Japan and your home country. With a Wise multi-currency account, you get Japanese bank details (a real Japanese account number) that you can use for domestic transfers, plus the ability to send money internationally at the real exchange rate.

    For a detailed breakdown, check out my full Wise Japan review — it covers setup, fees, and how I use it alongside my Japanese bank accounts.

    Pros:

    • Real mid-market exchange rates with transparent, low fees
    • Japanese bank details for receiving domestic transfers
    • Manage everything in English from the app
    • No residency period required — sign up from anywhere
    • Wise debit card for spending in multiple currencies

    Cons:

    • Not a full replacement for a Japanese bank account (can’t set up auto-payments for rent, utilities, etc.)
    • No cash deposit options
    • Some Japanese services don’t accept Wise account numbers
    • Verification can take a few days

    Step-by-Step Guide: How to Actually Open a Bank Account in Japan

    Now that you know which banks to target, let’s walk through the actual process. This applies to most banks, with some variations.

    Step 1: Get Your Residence Card

    This is non-negotiable. You receive your residence card (在留カード / zairyū kādo) at the airport when you land (if arriving at Narita, Haneda, Kansai, or a few other major airports) or at your local immigration office. Without it, no bank will open an account for you. Make sure your address is registered on the back — you do this at your local city or ward office within 14 days of moving in.

    Step 2: Gather Your Documents

    For most banks, you’ll need:

    • Residence card (with registered address on the back)
    • Passport
    • Your personal seal (inkan/hanko) — some banks accept signatures now, but having a seal makes everything smoother. You can order one online or buy one at a local hanko shop for around ¥1,000-3,000. Pick up a custom hanko on Amazon before you arrive if you want to be prepared.
    • Initial deposit — usually ¥1,000 or so (some banks require nothing)
    • Phone number — a Japanese phone number is required for virtually all banks. If you haven’t set this up yet, check out my Japan SIM card guide to get connected quickly.
    • My Number card or notification (needed for investment accounts, sometimes requested)

    Step 3: Choose Your Application Method

    In-branch (Japan Post Bank, mega-banks): Visit during weekday banking hours (typically 9:00 AM – 3:00 PM — yes, 3 PM). Bring all documents. Be prepared to fill out forms in Japanese. If your Japanese is limited, bring a Japanese-speaking friend or use a translation app. The process takes 30-60 minutes, and you’ll usually receive your passbook immediately but your cash card will be mailed to you in 1-2 weeks.

    Online (Sony Bank, Shinsei Bank, Wise): Download the app or visit the website. Follow the English instructions. Upload photos of your residence card and passport. Complete identity verification (usually a video selfie or photo). Wait for your card to arrive by mail — typically 1-2 weeks.

    Step 4: Activate Your Account

    Once you receive your cash card or debit card, you’ll need to activate it — usually at an ATM for physical cards, or through the app for online banks. Set your PIN, make a test transaction, and register for online banking if you haven’t already.

    Step 5: Set Up Essential Services

    Once your account is active, you’ll want to:

    • Register for automatic utility bill payments (口座振替 / kōza furikae)
    • Give your account details to your employer for salary deposits
    • Set up the bank’s mobile app
    • Link your account to cashless payment services like PayPay or LINE Pay

    Common Pitfalls and Pro Tips

    After helping countless people through this process, here are the mistakes I see most often — and how to avoid them:

    The Six-Month Rule: Some banks (especially mega-banks) require foreigners to have lived in Japan for six months before opening an account. This is technically a guideline, not a law, and it varies by branch. Shinsei Bank and Sony Bank generally don’t enforce it. Japan Post Bank is hit or miss. If one branch turns you down, try another — I’ve seen people succeed at a different branch of the same bank on the same day.

    ATM Hours: Yes, in Japan, ATMs have operating hours. Many bank ATMs shut down at night and charge fees outside of core hours. Convenience store ATMs (Seven Bank, Lawson Bank, E-net) tend to have longer hours but may charge ¥110-220 per transaction depending on your bank and the time of day.

    Cash is Still King (Sort of): While Japan has made huge strides in cashless payments since 2020, many smaller restaurants, clinics, and shops still only accept cash. Having a bank account with easy ATM access remains essential.

    International Transfers from Japanese Banks Are Painful: The fees are high (¥3,000-6,000 per transfer), the exchange rates are terrible, and the process often requires a branch visit. This is exactly why I recommend setting up Wise alongside your Japanese bank account. Use your Japanese bank for domestic stuff, Wise for anything international.

    Bring a Translator for Branch Visits: If you’re opening an account in-branch and your Japanese isn’t conversational, bring someone who can help. Bank staff are generally patient and kind, but the forms and explanations involve specific financial terminology that even intermediate Japanese speakers struggle with. A pocket translator or the Google Translate camera feature on your phone can help in a pinch — a dedicated translator device can be a lifesaver for these situations.

    After ten years of trial and error, here’s the banking combination I recommend to every new expat:

    1. Primary account — Sony Bank or SBI Shinsei Bank: Your main account for salary, savings, and everyday spending. Full English support means you can actually manage your money without stress.
    2. Secondary account — Japan Post Bank: For domestic transfers to landlords, businesses, or anyone who specifically needs a Yucho transfer. Also useful as a backup ATM option since post offices are everywhere.
    3. International transfers — Wise: For sending money home, receiving payments from overseas clients, or converting currencies without getting robbed by exchange rate markups.

    This three-account setup covers virtually every financial situation you’ll encounter as an expat in Japan. It might seem like overkill, but trust me — each account serves a distinct purpose, and you’ll be grateful for the flexibility.

    Don’t forget to keep organized with your important documents — a good document organizer will help you keep your bank paperwork, residence card copies, and other essentials in one place.

    Frequently Asked Questions

    Can I open a Japanese bank account as a tourist?

    No. You need a valid residence card (在留カード) with a registered Japanese address to open a bank account in Japan. Tourist visa holders cannot open accounts. The only exception is Wise, which you can set up before arriving, though you won’t get full Japanese bank details without residency verification. If you’re visiting Japan temporarily and need to manage money, a Wise or Revolut card with preloaded yen is your best option.

    How long does it take to open a bank account in Japan?

    For in-branch applications (Japan Post Bank

    Send Money to Japan with Wise →

    The easiest way to fund your Japanese bank account from overseas.

    Affiliate link — we may earn a commission at no extra cost to you.

    Affiliate Disclosure: This article contains affiliate links. If you click through and make a purchase or sign up for a service, I may earn a small commission at no extra cost to you. This helps keep the site running and allows me to continue creating free guides for expats in Japan. All recommendations are based on my personal experience and research.

    📋
    Get the Free Moving to Japan Checklist
    Visas, banking, health insurance, apartments — the full guide for expats, delivered to your inbox.


  • Japan Health Insurance for Foreigners: Your Complete Guide to Coverage in 2026

    Japan Health Insurance for Foreigners: Your Complete Guide to Coverage in 2026

    Affiliate Disclosure: This article contains affiliate links. If you click through and make a purchase or sign up for a service, I may earn a small commission at no extra cost to you. This helps keep this site running and allows me to continue providing free, honest advice about living in Japan. All recommendations are based on my personal experience and research.

    🛡️
    Recommended for Expats
    SafetyWing — Flexible Health Insurance for Japan
    SafetyWing Nomad Insurance covers medical emergencies, hospital visits, and emergency evacuation worldwide — including Japan. Subscribe monthly and pause any time you’re back home. No long-term commitment required.

    Get a Quote →From ~$45/month · Pause when home · Used by 250,000+ nomads

    Introduction: Why Health Insurance in Japan Isn’t Optional (Literally)

    Let me start with something that surprises a lot of newcomers: health insurance in Japan isn’t a nice-to-have. It’s legally mandatory. Every single resident — Japanese or foreign — must be enrolled in some form of health insurance. There’s no “I’ll just pay out of pocket” option here. Well, technically you could try that, but you’d be breaking the law, and when you eventually need medical care, you’ll face the full uninsured cost plus potential back-payments of premiums you skipped.

    I learned this the hard way when I first arrived. I delayed signing up for National Health Insurance by about three weeks because I was overwhelmed with apartment hunting, getting my residence card sorted, and figuring out how to use a Japanese washing machine (seriously, those control panels are no joke). When I finally enrolled at my local ward office, they backdated my premiums to my date of arrival. Lesson learned.

    The good news? Japan’s healthcare system is genuinely excellent. It consistently ranks among the best in the world, and the costs — even before insurance kicks in — are remarkably reasonable compared to the United States, UK private care, or Australia. After insurance, a typical doctor’s visit might cost you ¥1,000-¥3,000 (roughly $7-$20). An MRI that would cost $1,500+ in the US? Around ¥5,000-¥8,000 out of pocket here.

    But navigating the system as a foreigner can be confusing. There are multiple types of insurance, different enrollment rules depending on your visa type, and supplementary private options worth considering. In this guide, I’ll break it all down based on what I’ve learned living here and helping dozens of friends and readers get properly covered.

    If you’re still in the planning stages, check out our complete moving to Japan checklist to make sure health insurance is part of your pre-departure prep.

    How Japan’s Health Insurance System Works for Foreigners in 2026

    Japan has two main public health insurance systems, and which one you’ll join depends on your employment situation:

    1. Employees’ Health Insurance (Shakai Hoken / 社会保険)

    If you’re employed by a Japanese company (or a company operating in Japan), you’ll almost certainly be enrolled in Shakai Hoken. This is the employer-sponsored system, and it’s the gold standard. Your employer handles enrollment, and premiums are split roughly 50/50 between you and your employer. Premiums are automatically deducted from your paycheck, so you barely have to think about it.

    Coverage highlights:

    • 70% of medical costs covered (you pay 30%)
    • Includes pension contributions
    • Covers dependents (spouse and children) at no additional premium
    • Maternity and childcare leave benefits
    • Injury/illness leave allowance (sickness benefits)
    • High-cost medical expense benefit (caps your monthly out-of-pocket)

    2. National Health Insurance (Kokumin Kenko Hoken / 国民健康保険)

    If you’re self-employed, freelancing, studying, or otherwise not covered by an employer’s plan, you’ll enroll in NHI (National Health Insurance) through your local city or ward office. This is the catch-all system for everyone not in Shakai Hoken.

    Coverage highlights:

    • 70% of medical costs covered (you pay 30%) — same as Shakai Hoken
    • You pay 100% of the premium (no employer share)
    • Premiums vary significantly by municipality and your previous year’s income
    • Each family member needs their own enrollment (dependents aren’t free)
    • High-cost medical expense benefit also applies

    Here’s an important note for 2026: if you’re on a visa of 3 months or longer, you’re eligible and required to enroll in one of these systems. Short-term tourists on 90-day visa waivers are not eligible and should carry travel insurance instead.

    National Health Insurance (NHI): The Deep Dive for Self-Employed and Freelance Foreigners

    NHI is what most freelancers, language students, remote workers, and newly arrived foreigners without immediate employment will use. Let me break down the practical details.

    How to Enroll

    Within 14 days of getting your residence card (zairyu card), head to your local city hall or ward office (区役所 / 市役所). Bring your residence card and passport. The process takes about 30-45 minutes, and you’ll receive your insurance card (hokensho) either that day or by mail within a couple of weeks.

    How Much Does NHI Cost?

    This is where it gets complicated. NHI premiums are calculated based on:

    • Your previous year’s income in Japan
    • The number of household members enrolled
    • Your municipality’s specific rates
    • A flat-rate per-person component

    For a newly arrived foreigner with no previous Japanese income, your first year’s premiums will typically be quite low — sometimes as little as ¥2,000-¥5,000 per month. But brace yourself: in your second year, once your income is on record, premiums can jump significantly. I’ve seen freelancers earning ¥4-5 million annually paying ¥30,000-¥50,000 per month for NHI. It stings, but the coverage is solid.

    Pros

    • Easy to enroll — just visit your ward office
    • Comprehensive coverage at any clinic or hospital in Japan
    • High-cost medical expense system caps your out-of-pocket
    • Low premiums in your first year
    • Prescription drugs covered at 30% co-pay

    Cons

    • Premiums can be expensive for higher earners
    • No sickness/injury leave benefits (unlike Shakai Hoken)
    • Each family member requires separate enrollment and premium
    • Dental coverage is basic (cosmetic work not covered)
    • Limited coverage for care received outside Japan

    Employer Health Insurance (Shakai Hoken): What You Need to Know

    If you’ve landed a job in Japan — whether teaching English, working in tech, or joining a Japanese firm — Shakai Hoken is your ticket. Your HR department handles nearly everything.

    Premiums

    Premiums are typically around 10-13% of your monthly salary, split evenly with your employer. So if you earn ¥300,000/month, you might pay around ¥15,000-¥20,000 and your employer matches it. This also includes your pension (nenkin) contributions, which is a nice bundle deal.

    Pros

    • Employer pays half your premium
    • Dependents covered at no extra cost
    • Sickness and injury leave benefits (roughly 2/3 of salary for up to 18 months)
    • Maternity benefits included
    • Pension included in the package
    • Hassle-free — employer manages everything

    Cons

    • Only available if you’re formally employed
    • Less control over your plan
    • Switching jobs means temporary gaps if not careful
    • Part-time workers may not qualify (must work 30+ hours/week or meet specific criteria)

    Private Health Insurance: When and Why Foreigners Should Consider It

    Here’s where things get interesting. Japan’s public insurance is great, but there are gaps. Private insurance can fill them, and for some expats, it’s absolutely worth the investment.

    Why Consider Private Insurance?

    • English-speaking support: Public insurance doesn’t come with English customer service. Private international plans often do.
    • Coverage outside Japan: NHI provides minimal overseas coverage. If you travel frequently, private insurance bridges that gap.
    • Higher-end dental and vision: Japanese public insurance covers basic dental but not cosmetic procedures, orthodontics, or premium vision care.
    • Private hospital rooms: Public insurance covers shared rooms. Want privacy? You’ll pay out of pocket unless you have supplementary coverage.
    • Income protection: If you’re self-employed, NHI doesn’t provide sickness benefits. Private income protection insurance can be a lifesaver.

    Top Private Health Insurance Options for Foreigners in Japan (2026)

    SafetyWing Nomad Insurance

    Best for remote workers and digital nomads who aren’t yet enrolled in Japanese public insurance or who need global coverage. SafetyWing offers affordable monthly plans starting around $45-$85/month depending on your age and coverage level. It’s not a replacement for NHI (you still need to enroll), but it’s excellent supplementary and travel coverage.

    PRESTIA / Cigna Global

    For expats who want premium international coverage, Cigna Global offers customizable plans that work alongside Japanese public insurance. Plans start around $150-$300/month but include worldwide coverage, English support, and access to private hospitals. Best for executives, higher earners, or those with families.

    Japanese Domestic Insurers (Aflac Japan, MetLife Japan, etc.)

    These companies offer supplementary “iryo hoken” (medical insurance) policies popular among both Japanese and foreign residents. They typically pay a daily hospital benefit (e.g., ¥5,000-¥10,000 per day hospitalized) and lump sums for surgery or serious illness. Premiums can be as low as ¥2,000-¥5,000/month. The catch: applications and customer service are primarily in Japanese.

    Essential Items for Managing Healthcare in Japan

    Beyond insurance itself, there are some practical items that make navigating Japan’s healthcare system much easier as a foreigner. I recommend having these ready:

    A good Japanese-English medical dictionary or phrase book is invaluable when visiting clinics where staff don’t speak English. Even with improving translation technology, having a dedicated medical phrase book gives you confidence in appointments. Browse Japanese-English medical dictionaries on Amazon.

    A portable health document organizer helps you keep your insurance card, prescriptions, medical records, and vaccination history together. Japanese clinics often ask for your medication history (o-kusuri techo), and having everything organized saves headaches. Check out health document organizers on Amazon.

    A basic thermometer and first-aid kit stocked with familiar products is worth having at home. Japanese pharmacies are excellent, but product labels are in Japanese, and during a health scare, you don’t want to be guessing. Find travel first-aid kits on Amazon.

    Having a reliable way to communicate is also essential for finding clinics and making appointments. Our Japan SIM card guide covers the best options for staying connected from day one.

    How to Choose the Right Health Insurance: A Buying Guide for Foreigners in Japan

    Let me simplify the decision process based on the most common scenarios:

    Scenario 1: You’re Moving to Japan for a Job

    What you need: Your employer will enroll you in Shakai Hoken. Done. Consider adding a supplementary domestic policy (like Aflac Japan) for extra hospitalization coverage if you want peace of mind. Budget: ¥2,000-¥5,000/month extra.

    Scenario 2: You’re Freelancing or Self-Employed

    What you need: Enroll in NHI at your ward office (mandatory). Strongly consider private income protection insurance since NHI doesn’t cover lost income during illness. If you travel outside Japan frequently, add SafetyWing or similar for international coverage.

    Scenario 3: You’re a Student

    What you need: NHI enrollment (mandatory). Your premiums will be very low since student income is minimal. Many universities also offer supplementary student insurance plans — take them. They’re cheap and cover things like accidents and liability.

    Scenario 4: You’re a Digital Nomad / Remote Worker

    What you need: If you have a valid residence status (3+ months), enroll in NHI. Supplement with SafetyWing or World Nomads for global coverage. If you’re on a short-term tourist visa, you won’t qualify for NHI — carry comprehensive travel insurance from day one.

    Scenario 5: You’re Retiring in Japan

    What you need: NHI enrollment. Consider a robust supplementary plan from Cigna Global or a domestic insurer, especially for long-term care coverage. Japan’s aging population means the long-term care system is well-developed, but having extra coverage ensures you get the care level you want.

    Key Factors to Compare

    Factor NHI Shakai Hoken Private (International)
    Monthly Cost ¥2,000-¥60,000+ ~5-6.5% of salary $45-$300+
    Coverage Ratio 70% 70% 80-100%
    English Support No Rarely Yes
    Overseas Coverage Minimal Minimal Yes
    Dental Basic Basic Varies by plan
    Dependents Separate enrollment Included free Varies by plan

    Practical Tips for Using Health Insurance in Japan

    Having insurance is one thing. Actually using it effectively is another. Here are tips from years of experience:

    • Always carry your insurance card (hokensho). No card, no insurance rate. You’ll pay 100% upfront and have to file for reimbursement later — which is a bureaucratic headache.
    • Find English-speaking clinics early. Don’t wait until you’re sick. Search “English-speaking doctor [your city]” now and save the info. Tokyo and Osaka have many options; rural areas, fewer.
    • Know about the High-Cost Medical Expense system (Kogaku Ryoyo-hi). This caps your monthly out-of-pocket medical expenses based on your income bracket. For most working-age adults, the cap is around ¥80,000-¥90,000/month. Anything above that is covered. This is one of the best features of Japanese insurance.
    • Get a “o-kusuri techo” (medication notebook). Pharmacies will give you one for free. It tracks all your prescriptions and helps prevent dangerous drug interactions. Doctors and pharmacists actually read these.
    • Dental checkups are covered. Basic cleanings and checkups under public insurance are cheap (¥2,000-¥4,000). Go regularly. Japanese dentists are generally excellent.
    • Mental health coverage exists but is limited. Psychiatry visits are covered under public insurance, but therapy/counseling often isn’t. English-speaking therapists typically charge ¥8,000-¥15,000 per session out of pocket.

    For managing payments and handling insurance reimbursements, having a proper bank account set up is essential. Using a service like Wise for your Japan finances can help you manage costs across currencies if you’re receiving income from abroad.

    Frequently Asked Questions

    Can I opt out of Japan’s public health insurance as a foreigner?

    No. If you’re a registered resident of Japan with a visa of 3 months or longer, enrollment in either NHI or Shakai Hoken is legally mandatory. There is no opt-out, even if you have private international insurance. Some foreigners try to skip enrollment, but this can create problems when renewing your visa, as immigration authorities increasingly check for health insurance compliance. Unpaid premiums can also be pursued with penalties and interest.

    What happens if I need emergency care before my insurance card arrives?

    Go to the hospital. Japan will not turn you away for emergency care. You’ll likely need to pay the full amount upfront (100%), but you can submit a claim for reimbursement once you receive your insurance card. Keep all receipts and medical documents. Visit your ward office as soon as your card arrives to file for reimbursement of the 70% that insurance would have covered.

    Does Japan health insurance cover pre-existing conditions?

    Yes — this is one of the huge advantages of Japan’s public insurance system. Both NHI and Shakai Hoken cover pre-existing conditions with no waiting periods, exclusions, or premium surcharges. From the day you’re enrolled, everything is covered at the standard 70% rate. This is a game-changer for people coming from countries where pre-existing conditions affect coverage or premiums (looking at you, United States).

    How does Japan health insurance work for pregnancy and childbirth?

    Normal pregnancy and childbirth are not considered “illness” under Japanese insurance, so regular prenatal checkups and delivery aren’t covered at the 70% rate. However, you

    📋
    Get the Free Moving to Japan Checklist
    Visas, banking, health insurance, apartments — the full guide for expats, delivered to your inbox.


  • The Ultimate Moving to Japan Checklist (2026 Edition): Everything You Need Before, During & After Your Move

    The Ultimate Moving to Japan Checklist (2026 Edition): Everything You Need Before, During & After Your Move

    Affiliate Disclosure: This article contains affiliate links. If you click through and make a purchase, I may earn a small commission at no extra cost to you. I only recommend products and services I’ve personally used or thoroughly vetted during my years living in Japan. Thanks for supporting the site!

    🛡️
    Recommended for Expats
    SafetyWing — Flexible Health Insurance for Japan
    SafetyWing Nomad Insurance covers medical emergencies, hospital visits, and emergency evacuation worldwide — including Japan. Subscribe monthly and pause any time you’re back home. No long-term commitment required.

    Get a Quote →From ~$45/month · Pause when home · Used by 250,000+ nomads

    💸
    Recommended Tool
    Wise — The Expat Standard for Money Transfers
    Wise uses the real mid-market exchange rate with low, transparent fees. Most expats in Japan use it for sending money home or paying bills. No hidden markups, no surprises.

    Open a Wise Account →Free to open · No monthly fees · Used by 16M+ people

    Introduction: Why You Need a Real Moving to Japan Checklist

    I still remember the weeks before my own move to Japan — frantically Googling things at 2 AM, wondering if I’d forgotten something critical, and feeling like I was trying to drink from a firehose of information. After helping dozens of friends and readers make the same move over the past decade, I can tell you this: the difference between a smooth transition and a chaotic nightmare usually comes down to preparation.

    Moving to Japan in 2026 is simultaneously easier and more complex than ever before. Digital nomad visas, updated immigration procedures, cashless payment systems, and post-pandemic changes have reshaped the expat landscape. But the fundamentals remain — you need the right visa, the right gear, the right banking setup, and a realistic understanding of what life on the ground actually looks like.

    This isn’t some generic relocation checklist copy-pasted from an embassy website. This is the actual, battle-tested list I wish I’d had when I moved — broken into clear phases, packed with specific product recommendations, and written by someone who has actually navigated Japanese bureaucracy, tiny apartments, and the glorious confusion of daily life in Japan.

    Let’s get you ready.

    Quick Overview: My Top Recommendations for Moving to Japan

    Before we dive into the full checklist, here’s a snapshot of the essential products and services that consistently make the biggest difference for new arrivals. I’ll cover each in detail below.

    Category Top Pick Why It Matters
    International Money Transfer Wise (TransferWise) Best exchange rates, essential for rent & setup costs
    Japan SIM Card / eSIM Ubigi or Mobal eSIM Connectivity from the moment you land
    VPN Service ExpressVPN or NordVPN Access home content, protect data on public WiFi
    Language Learning Japatalk + Anki combo Survival Japanese accelerates everything
    Luggage & Packing Compression packing cubes + 2 checked bags Japan apartments are tiny — pack smart
    Power Adapters Universal adapter (Type A) Japan uses Type A plugs, 100V power

    Phase 1: Three to Six Months Before Your Move

    Visa & Documentation

    This is the non-negotiable foundation. Everything else is secondary until your visa situation is locked down. In 2026, the most common visa categories for expats are:

    • Work Visa (Engineer/Specialist in Humanities/International Services) — The most common for English teachers and corporate transfers
    • Highly Skilled Professional Visa — Points-based, fast-tracked, and increasingly popular
    • Student Visa — For language school or university enrollment
    • Spouse/Dependent Visa — If your partner is Japanese or already has a valid visa
    • Digital Nomad Visa — Japan’s relatively new option for remote workers earning foreign income

    Checklist items:

    • ☐ Confirm visa category and gather required documents (Certificate of Eligibility if applicable)
    • ☐ Ensure passport is valid for at least 1 year beyond your planned arrival
    • ☐ Get 5-10 passport photos (Japanese specification: 45mm x 35mm) — you’ll burn through these
    • ☐ Obtain certified copies of university diplomas and transcripts (apostilled if required)
    • ☐ Get an international driving permit (IDP) if you plan to drive — valid only 1 year, and Japan only accepts the 1949 Geneva Convention format
    • ☐ Request sealed copies of your criminal background check if needed for your visa type
    • ☐ Arrange health check / medical records (bring vaccination records, especially COVID-related)

    Financial Preparation

    Japan is still more cash-heavy than you’d expect in 2026, but the financial landscape is evolving. Here’s what to sort out before you leave:

    • Set up a Wise account — This is the single best tool for transferring money internationally. You’ll need it to pay initial deposits, first month’s rent, and setup costs before you have a Japanese bank account. The mid-market exchange rate alone will save you hundreds of dollars compared to traditional bank transfers. Read my full Wise review for Japan expats here.
    • ☐ Notify your home bank you’re moving abroad (avoid frozen cards)
    • ☐ Get a no-foreign-transaction-fee credit card as a backup
    • ☐ Save at minimum ¥500,000–¥800,000 ($3,300–$5,300 USD) for initial setup costs — security deposits, key money, furniture, and first month’s living expenses add up fast
    • ☐ Research your tax obligations in both countries — double taxation treaties exist between Japan and most Western nations

    Housing Research

    Unless your company provides housing, start researching early. The Japanese rental system is notoriously unique — expect to pay key money (礼金, reikin), security deposits (敷金, shikikin), guarantor company fees, and agency fees that can total 4-6 months of rent upfront.

    • ☐ Research neighborhoods using GaijinPot Apartments, Real Estate Japan, or Suumo (with Google Translate)
    • ☐ Decide between furnished (rare and expensive) or unfurnished (standard)
    • ☐ Consider share houses for your first 1-3 months — Oakhouse and Borderless House are popular and require minimal upfront costs
    • ☐ Understand that most apartments are small — a “spacious” 1K in Tokyo is about 25-30 square meters

    Phase 2: One to Three Months Before Departure

    Essential Gear & Packing

    Here’s where most checklists fail — they don’t tell you what to actually bring versus what to buy in Japan. After years of trial and error, here’s my approach:

    Bring from home:

    • Compression packing cubes — Absolutely essential for maximizing luggage space. Japanese closets are tiny. Browse top-rated compression packing cubes on Amazon
    • Universal power adapter — Japan uses Type A (two flat prongs), 100V. Most modern electronics handle the voltage, but hair dryers and curling irons from the US/EU may not work properly. Find Japan-compatible power adapters here
    • Deodorant — Sounds funny, but Western-strength deodorant is genuinely hard to find in Japan. Stock up. Grab your preferred brand before you go
    • ☐ Medications with English labels (plus a doctor’s letter for prescription meds — some ingredients like pseudoephedrine and certain ADHD medications are restricted or banned in Japan)
    • ☐ Larger shoe sizes (above US men’s 10 / women’s 8 are nearly impossible to find)
    • ☐ Larger clothing if you’re above average Western sizes
    • ☐ A good portable WiFi battery/power bank for travel days — I recommend Anker 20,000mAh models

    Buy in Japan (don’t waste luggage space):

    • Bedding and towels (100-yen shops and Nitori are your friends)
    • Kitchen supplies
    • Umbrella (you’ll need a good one — Japan is rainy)
    • Stationery (Japan has the best stationery in the world, period)
    • Electronics (often cheaper domestically)

    Connectivity Setup

    Being connected the moment you land is non-negotiable in 2026. You’ll need internet access for Google Maps, translation apps, and communication with your new employer or school.

    • Get a Japan eSIM or SIM card — Order before departure so it’s ready to activate when you land at Narita or Haneda. Options like Ubigi, Mobal, and IIJmio are solid choices for new arrivals. Check out my complete Japan SIM card guide for a detailed comparison.
    • Install a VPN — You’ll want access to your home country’s Netflix, news, banking sites, and more. Plus, Japan has a lot of public WiFi that isn’t secure. ExpressVPN and NordVPN both work reliably in Japan. See my VPN for Japan comparison here.
    • ☐ Download offline maps of your destination city in Google Maps
    • ☐ Install essential apps: Google Translate (with Japanese offline pack), Hyperdia or Navitime for train navigation, and LINE (Japan’s dominant messaging app — more important than WhatsApp or iMessage here)

    Language Preparation

    You don’t need to be fluent to move to Japan, but survival-level Japanese will dramatically improve your first few months. At minimum, learn hiragana, katakana, and basic daily phrases.

    Phase 3: The Week Before & Travel Day

    • ☐ Print hard copies of your Certificate of Eligibility, visa, apartment reservation, and employer contact info (don’t rely solely on your phone)
    • ☐ Carry at least ¥30,000–50,000 in cash ($200–$330 USD) — you’ll need it immediately for transport, food, and small purchases before you set up digital payments
    • ☐ Pack essential documents in your carry-on, NOT checked luggage: passport, visa documents, diploma copies, medical records, and your initial cash
    • ☐ Bring a pen for the arrival card on the plane — yes, Japan still uses paper forms in 2026 (though Visit Japan Web has digitized parts of the process)
    • ☐ Wear comfortable shoes — you’ll be standing in immigration lines and navigating stations with luggage
    • ☐ Set your phone’s eSIM to activate upon landing

    Phase 4: Your First Two Weeks in Japan

    This is the critical window where everything either clicks into place or spirals. Here’s your priority order:

    Day 1-3: Immediate Essentials

    • Visit your local ward office (区役所, kuyakusho) — Register your address. This is the single most important administrative task. You cannot open a bank account, get health insurance, or do almost anything official without a registered address and your residence card (在留カード, zairyū card).
    • ☐ Get your residence card updated with your address at the ward office
    • ☐ Enroll in National Health Insurance (国民健康保険) if your employer doesn’t provide insurance immediately
    • ☐ Enroll in the National Pension System (国民年金) — yes, it’s mandatory, and yes, many countries have agreements that let you claim it back or transfer it later
    • ☐ Buy a Suica or Pasmo IC card for trains and buses (also works at convenience stores and vending machines)

    Week 1-2: Setting Up Your Life

    • Open a Japanese bank account — Japan Post Bank (ゆうちょ銀行) is the most foreigner-friendly option and has branches everywhere. Some banks require you to have been in Japan for 6 months before opening an account, but Japan Post Bank and Shinsei Bank are generally more flexible for new arrivals.
    • ☐ Get a Japanese phone number (upgrade from your travel SIM to a proper contract if needed)
    • ☐ Set up utilities if not included in your housing: electricity, gas, water, and internet. Your landlord or real estate agent should provide the forms. Internet installation can take 2-4 weeks, so order immediately.
    • ☐ Register your My Number (マイナンバー) — Japan’s tax/social security number system. You’ll receive a notification at your registered address.
    • ☐ Explore your neighborhood: locate the nearest convenience store (your lifeline), supermarket, clinic, and train station
    • ☐ Get a hanko (印鑑) — Your personal seal/stamp used in place of signatures for official documents. You can order one online or get one made at a local hanko shop for ¥1,000-3,000. You can also pre-order a custom hanko here.

    The Gear That Made the Biggest Difference: Detailed Reviews

    Wise Multi-Currency Account

    Pros:

    • True mid-market exchange rate with transparent, low fees
    • Hold and convert 50+ currencies
    • Debit card works at Japanese ATMs and stores
    • Instant transfers to Japanese bank accounts once you have one

    Cons:

    • Not a replacement for a Japanese bank account (you’ll still need one for salary deposits and direct debits)
    • ATM withdrawal limits apply

    Wise is the tool I recommend to literally every person moving to Japan. The savings on exchange rates compared to traditional bank wires are significant — we’re talking potentially hundreds of dollars saved on your initial apartment setup alone.

    VPN for Japan (ExpressVPN / NordVPN)

    Pros:

    • Access geo-blocked content from your home country
    • Secure browsing on Japan’s abundant public WiFi networks
    • Both services maintain fast, reliable servers in and near Japan

    Cons:

    • Monthly subscription cost (though annual plans bring it down to a few dollars per month)
    • Very occasional speed reduction on certain servers

    I’ve used both extensively. ExpressVPN edges ahead for speed; NordVPN wins on price. Either will serve you well.

    Compression Packing Cubes

    Pros:

    • Reduce clothing volume by up to 60%
    • Keep luggage organized during a chaotic move
    • Double as drawer organizers in tiny Japanese closets

    Cons:

    • Clothes come out wrinkled (steam them at your destination)

    These sound like a minor thing, but when you’re trying to fit your life into two suitcases and a carry-on, they’re a game-changer. I still use mine as closet organizers three years later. See the best-selling options on Amazon.

    Buying Guide: How to Prioritize Your Moving to Japan Budget

    Not everything on this checklist costs money, but the things that do can add up quickly. Here’s how I’d prioritize spending if you’re on a budget:

    Tier 1 — Non-Negotiable (Spend Whatever It Takes):

    • Visa fees and documentation
    • Initial housing costs (deposits, key money, first month rent)
    • Wise account setup and initial transfer
    • Japan SIM/eSIM for arrival day connectivity
    • Set Up Wise Before You Move →

      Transfer money to Japan instantly. Used by expats worldwide.

      Affiliate link — we may earn a commission at no extra cost to you.

      📋
      Get the Free Moving to Japan Checklist
      Visas, banking, health insurance, apartments — the full guide for expats, delivered to your inbox.


  • Best Language App for Japanese in 2026: What Actually Works (From Someone Who Lives Here)

    Best Language App for Japanese in 2026: What Actually Works (From Someone Who Lives Here)

    Introduction: Why Most People Fail at Learning Japanese (And How the Right App Changes Everything)

    Let me be brutally honest with you. When I moved to Japan over a decade ago, I thought I’d “pick up” the language by osmosis. You know, just living here, hearing it everywhere, maybe watching some anime without subtitles. That lasted about two weeks before I found myself unable to read my own electricity bill, accidentally ordering horse meat at an izakaya, and bowing apologetically at a post office worker who was simply trying to ask if I wanted stamps.

    Japanese is genuinely one of the hardest languages for English speakers. You’re dealing with three writing systems (hiragana, katakana, and kanji), a grammar structure that puts the verb at the end of the sentence, multiple politeness levels, and counting systems that change depending on what you’re counting. Flat objects? Different counter. Small animals? Different counter. It’s a lot.

    But here’s the good news: language apps in 2026 are genuinely excellent, and the right one can take you from pointing-at-menus survival mode to actually having conversations with your neighbors. I’ve personally used, tested, abandoned, and returned to more Japanese learning apps than I care to admit. Some were incredible. Others were glorified flashcard machines that taught me how to say “the elephant is in the library” — useful for absolutely no real-world scenario I’ve ever encountered.

    This guide is my honest breakdown of the best language apps for Japanese right now. Whether you’re preparing for your move to Japan or you’ve been here for years and still panic when the phone rings, there’s an app here that fits your situation.

    Quick Comparison: Best Japanese Language Apps at a Glance

    App Best For Price (2026) Difficulty Level My Rating
    JapanesePod101 All-around learning Free – $47/mo Beginner to Advanced ⭐⭐⭐⭐⭐
    WaniKani Kanji mastery $9/mo or $299 lifetime Beginner to Advanced ⭐⭐⭐⭐⭐
    Pimsleur Japanese Speaking & listening $21.99/mo Beginner to Intermediate ⭐⭐⭐⭐½
    Bunpro Grammar $5.50/mo – $8/mo Beginner to Advanced ⭐⭐⭐⭐½
    Duolingo Casual beginners Free – $13.99/mo Beginner ⭐⭐⭐
    italki Live tutoring $7–$30/lesson All levels ⭐⭐⭐⭐⭐
    Anki Customized flashcards Free (desktop) / $24.99 iOS All levels ⭐⭐⭐⭐

    JapanesePod101 — Best All-Around Japanese Learning App

    If I could only recommend one resource to someone about to move to Japan, it would be JapanesePod101. I started using it in my first year here and I still occasionally fire up a lesson when I’m on the train. The audio-based lesson format is perfect for busy expat life — you can listen while commuting, cooking, or pretending to work from home.

    What sets JapanesePod101 apart is the sheer volume of content organized by real proficiency levels, from absolute beginner (“where is the bathroom?”) to advanced (“let me explain the nuances of this business proposal”). The lessons feature native speakers having natural conversations, with English explanations woven in. They also provide PDF lesson notes, vocabulary lists, and line-by-line breakdowns.

    The Premium Plus plan even gives you a personal teacher who assigns homework and tracks your progress. Is it necessary? No. Is it helpful if you need accountability? Absolutely.

    Pros:

    • Massive library with thousands of lessons updated regularly
    • Audio-first format perfect for learning on the go
    • Covers reading, writing, speaking, listening, and cultural context
    • Practical, real-world vocabulary (not “the elephant is in the library”)
    • Generous free tier to test it out

    Cons:

    • The dashboard can feel overwhelming with so much content
    • Premium Plus is expensive ($47/month)
    • Occasional upsell emails

    You can also supplement your studies with a good Japanese textbook like Genki for structured grammar study alongside the app.

    WaniKani — Best App for Learning Kanji (And Actually Remembering Them)

    Kanji is the wall that stops most Japanese learners. There are over 2,000 “daily use” kanji, and traditional rote memorization is soul-crushingly boring. WaniKani uses a spaced repetition system (SRS) combined with mnemonics — little stories that help you remember each character. And honestly? It works embarrassingly well.

    WaniKani teaches you radicals first (the building blocks of kanji), then the kanji themselves, then vocabulary words that use those kanji. It’s structured and you can’t skip ahead, which some people find frustrating but I think is genius. It forces you to build a solid foundation.

    After about a year of consistent WaniKani use, I went from being functionally illiterate to reading restaurant menus, street signs, and basic news articles. By level 30 (out of 60), you can read a surprising amount of everyday Japanese.

    Pros:

    • Mnemonics make kanji genuinely memorable
    • Structured progression prevents skipping fundamentals
    • Web-based with an excellent community
    • Lifetime subscription option is great value long-term

    Cons:

    • Only teaches kanji and related vocabulary — not grammar or conversation
    • Can’t skip levels even if you already know material
    • Reviews pile up quickly if you miss a few days
    • The first three levels are free, then you must subscribe

    Pimsleur Japanese — Best for Speaking Confidence

    Pimsleur has been around since the 1960s, and their method has stood the test of time for good reason. It’s purely audio-based, which means no reading, no writing — just listening and repeating. The program uses a graduated interval recall method, prompting you to repeat phrases at increasingly longer intervals until they’re burned into your memory.

    I used Pimsleur during my first three months in Japan, and it was the single biggest factor in my ability to have basic conversations early on. When you’re standing at the conbini and need to say “bag isn’t necessary” or asking for directions, Pimsleur phrases come out of your mouth almost automatically.

    The newer app version includes reading lessons and some visual components, but the audio core remains the star. Each lesson is exactly 30 minutes, making it easy to build a daily habit.

    Pros:

    • Excellent for pronunciation and natural speaking rhythm
    • No screen time required — learn while walking, driving, exercising
    • Forces active recall rather than passive recognition
    • 30-minute lessons create a sustainable daily routine

    Cons:

    • Doesn’t teach reading or writing at all (in the audio-only format)
    • Vocabulary is somewhat limited
    • Can feel repetitive if you’re an impatient learner
    • Monthly subscription adds up over time

    Pair Pimsleur with a set of Japanese phrasebooks and you’ll have a solid spoken foundation before you even land at Narita.

    Bunpro — Best App for Japanese Grammar

    Grammar is where Japanese gets really tricky, and Bunpro is the app that finally made it click for me. It’s essentially a spaced repetition system specifically designed for Japanese grammar points, organized by JLPT levels (N5 through N1).

    Each grammar point comes with clear explanations, example sentences, and links to external resources like Tae Kim’s Grammar Guide and various textbooks. You learn a grammar structure, then Bunpro quizzes you on it at intervals, requiring you to produce the correct form — not just recognize it.

    What I love most is that it maps directly to the JLPT exam structure, so if you’re planning to take the Japanese Language Proficiency Test (which many employers in Japan require or prefer), Bunpro essentially becomes your study roadmap.

    Pros:

    • Covers every grammar point from N5 to N1
    • SRS system ensures long-term retention
    • Links to multiple external explanations for each point
    • Affordable compared to most learning platforms
    • Active development team constantly improving the platform

    Cons:

    • Grammar-only — you need other apps for vocabulary and kanji
    • Some explanations assume basic Japanese knowledge
    • The interface, while improved, can still feel utilitarian

    Duolingo Japanese — Best Free Option for Absolute Beginners

    I know, I know. Duolingo gets a bad rap in the serious language learning community. And for Japanese specifically, it has real limitations. But I’d be lying if I said it wasn’t useful for one very specific group: absolute beginners who need a gentle, gamified on-ramp to the language.

    Duolingo teaches you hiragana and katakana through its lessons, introduces basic vocabulary and sentence patterns, and does it all with that addictive streak system that keeps you coming back. For someone who has never studied Japanese before and feels intimidated by the prospect, Duolingo is a non-threatening starting point.

    However — and this is a big however — Duolingo alone will not get you to conversational Japanese. The sentences can be unnatural, the grammar explanations are thin, and it doesn’t adequately prepare you for real-world interactions. Think of it as training wheels, not the bicycle.

    Pros:

    • Free tier is genuinely usable
    • Great for learning hiragana and katakana
    • Gamification keeps you motivated
    • Low commitment — perfect for testing your interest

    Cons:

    • Unnatural sentence constructions
    • Limited grammar explanations
    • Won’t prepare you for real conversations
    • The owl’s passive-aggressive notifications are emotionally manipulative (half joking)

    italki — Best for Live Practice with Real Tutors

    No app can fully replace talking to an actual human being, and italki is where you do that. It’s a platform connecting you with Japanese tutors and community teachers for one-on-one video lessons. Prices range from very affordable ($7-10 per session with community tutors) to premium ($25-30 with professional teachers).

    I’ve been using italki on and off for years. Having a weekly session with a tutor forces you to actually use what you’ve been studying in apps. It’s where passive knowledge becomes active ability. My tutor caught pronunciation habits, corrected my overly casual speech patterns (turns out I was talking to my boss like he was my college buddy), and helped me practice for real scenarios like doctor visits and apartment lease negotiations.

    The combination of self-study apps plus italki sessions is, in my opinion, the optimal learning stack for expats.

    Pros:

    • Real conversation practice with native speakers
    • Flexible scheduling — lessons available 24/7
    • Wide range of price points
    • Tutors can customize lessons to your exact needs

    Cons:

    • Quality varies between tutors — read reviews carefully
    • Requires more commitment than passive app learning
    • Costs add up if you take frequent lessons
    • Requires stable internet — make sure you have a solid connection with a reliable Japan SIM card

    Anki — Best Free Flashcard System for Dedicated Learners

    Anki is the Swiss Army knife of language learning. It’s a free (on desktop and Android; $24.99 on iOS) flashcard app that uses spaced repetition to help you memorize anything. The magic is in the community-made decks — thousands of pre-built flashcard sets for Japanese vocabulary, kanji, grammar, and even full sentences from textbooks like Genki and Tobira.

    Fair warning: Anki has a learning curve. The interface looks like it was designed in 2005 (because it was), and setting it up optimally requires some tinkering. But once you get it dialed in, it’s an incredibly powerful memory tool. Many serious Japanese learners consider it indispensable.

    The most popular deck for Japanese is “Core 2k/6k” which teaches you the most common 2,000-6,000 Japanese words with audio, example sentences, and kanji readings. If you study this deck consistently for a year, your reading comprehension will skyrocket.

    Pros:

    • Free on desktop and Android
    • Highly customizable — you control everything
    • Thousands of community-created Japanese decks
    • Spaced repetition algorithm is scientifically proven
    • Syncs across devices

    Cons:

    • Steep learning curve for setup
    • Dated, unintuitive interface
    • $24.99 on iOS (supports development)
    • Can become tedious without discipline
    • Passive recognition doesn’t always translate to active production

    The Ideal Japanese Learning App Stack: My Recommendation

    Here’s what I tell every person who asks me how to learn Japanese effectively as an expat. You don’t need one perfect app. You need a small stack that covers all the bases:

    1. Speaking & Listening: Pimsleur (months 1-6) → JapanesePod101 (ongoing)
    2. Kanji & Vocabulary: WaniKani (ongoing, daily)
    3. Grammar: Bunpro (start after learning hiragana/katakana)
    4. Live Practice: italki (1-2 sessions per week once you have basic foundations)
    5. Review & Reinforcement: Anki (daily, 15-20 minutes)

    This stack costs roughly $50-80/month depending on your choices, which is significantly less than a formal language school in Tokyo (which can run $500-1,500/month). And you can study in your pajamas.

    If you’re on a tight budget, go with: Duolingo (free) → Anki (free) → JapanesePod101 free tier → italki community tutors ($7-10/session). That’s an effective setup for under $40/month.

    Buying Guide: How to Choose the Right Japanese Language App

    With so many options, here’s how to narrow down what’s right for you:

    Consider Your Learning Stage

    Complete beginner? Start with Duolingo or Pimsleur to build basic familiarity without feeling overwhelmed. Once you know hiragana and katakana, expand to WaniKani and Bunpro.

    Intermediate learner? You’ll benefit most from WaniKani (kanji), Bunpro (grammar), and italki (conversation practice). Skip Duolingo entirely.

    Advanced learner? Focus on italki for nuanced conversation practice, Bunpro for N2/N1 grammar, and native content immersion.

    Consider Your Goals

    Survival Japanese for daily life: Pimsleur + JapanesePod101

    JLPT preparation: Bunpro + WaniKani + Anki

    Business Japanese: JapanesePod101 (business series) + italki professional tutor

    Reading manga/novels: WaniKani + Anki

    Affiliate Disclosure: This post contains affiliate links. If you purchase through these links, I may earn a small commission at no extra cost to you. I only recommend products I’ve personally used or thoroughly researched. This helps keep the site running so I can continue sharing real expat advice.

    📋
    Get the Free Moving to Japan Checklist
    Visas, banking, health insurance, apartments — the full guide for expats, delivered to your inbox.


  • Best VPN for Japan in 2026: What I Actually Use After 10 Years as an Expat

    Best VPN for Japan in 2026: What I Actually Use After 10 Years as an Expat

    Affiliate Disclosure: This article contains affiliate links. If you purchase a VPN through our links, we may earn a commission at no extra cost to you. We only recommend services we’ve personally tested and used while living in Japan. Our opinions are our own.

    Why You Actually Need a VPN in Japan (It’s Not What You Think)

    When I first moved to Japan back in 2016, a VPN wasn’t even on my radar. I figured Japan was a tech-forward country with blazing-fast internet — why would I need one? Then I tried to watch my Netflix US library. Then I tried to access my US bank account without triggering a fraud alert. Then I sat down at a Starbucks in Shibuya and connected to their open WiFi without a second thought.

    Yeah, I learned pretty quickly.

    Here’s the reality of being an expat in Japan in 2026: you need a VPN. Not because Japan censors the internet (it doesn’t, really), but because geo-restrictions will drive you absolutely insane. Your favorite streaming services show different content. Some websites flat-out block Japanese IP addresses. Your banking apps freak out when they see you logging in from Tokyo. And Japan’s love affair with free public WiFi — while convenient — is a security nightmare if you’re not protected.

    After testing dozens of VPNs over the past decade of living here, I’ve narrowed it down to the ones that actually work well in Japan. Not the ones that pay the most affiliate commissions. Not the ones with the flashiest ads. The ones that I personally keep installed on my devices right now in 2026.

    Whether you’re planning your move to Japan or you’ve already been here a while and are sick of seeing “this content is not available in your region,” this guide is for you.

    Quick Comparison: Top 5 VPNs for Japan in 2026

    VPN Service Japan Servers Speed Streaming Price (Monthly) Best For
    ExpressVPN Tokyo, Yokohama ★★★★★ ★★★★★ From $6.67/mo Overall best for expats
    NordVPN 100+ Japan servers ★★★★★ ★★★★★ From $3.49/mo Best value
    Surfshark Tokyo servers ★★★★☆ ★★★★★ From $2.49/mo Budget-friendly, unlimited devices
    ProtonVPN Tokyo, Osaka ★★★★☆ ★★★★☆ From $4.99/mo Privacy-focused users
    Mullvad VPN Tokyo ★★★★☆ ★★★☆☆ €5/mo flat Maximum anonymity

    ExpressVPN — The One I Recommend to Every New Expat

    I’ll be straight with you: ExpressVPN is what I’ve used as my primary VPN for the last six years in Japan. It’s not the cheapest option, but when you’re trying to stream the Champions League at 4 AM in your apartment in Nakameguro and you cannot deal with buffering, you understand why it’s worth the premium.

    ExpressVPN has servers in both Tokyo and Yokohama, which means you get excellent local speeds when you need a Japanese IP address. But more importantly for most expats, their servers back home (US, UK, Australia, Canada — wherever you’re from) are rock solid. I consistently get speeds above 300 Mbps on my fiber connection here, which is honestly barely different from my unprotected speed.

    The killer feature for Japan expats? Their MediaStreamer DNS service. Even on devices that don’t natively support VPNs (like older smart TVs or gaming consoles), you can configure it to access geo-restricted content. I’ve got it running on my PlayStation 5 to access US streaming libraries without any noticeable lag.

    Pros:

    • Fastest speeds I’ve tested in Japan — consistently reliable
    • Works with Netflix US/UK/AU, Hulu US, BBC iPlayer, HBO Max, Disney+
    • 24/7 live chat support that actually helps (tested at 3 AM JST, they responded in seconds)
    • Excellent apps for every device, including a solid router setup option
    • Split tunneling lets you use Japanese sites normally while routing other traffic through your home country
    • 30-day money-back guarantee

    Cons:

    • Most expensive option on this list
    • Limited to 8 simultaneous devices (enough for most people, but still)
    • No multi-year plans as cheap as competitors

    My take: If you can afford it, this is the one. I’ve had maybe three connection issues in six years. For something I use literally every day, that’s remarkable.

    NordVPN — Best Value for Japan Expats

    NordVPN is my “if ExpressVPN didn’t exist” pick, and honestly, in 2026 they’ve closed the gap significantly. With over 100 servers in Japan alone, you’re spoiled for choice when it comes to local connections. And their international server network is massive — over 6,000 servers in 111 countries.

    What really stands out for Japan expats is NordVPN’s Threat Protection Pro feature. Japan has a surprising amount of sketchy ads and trackers on domestic websites (looking at you, every Japanese news site ever), and this blocks them automatically. It works even when you’re not connected to the VPN, which is a nice bonus.

    Speed-wise, NordVPN uses the NordLynx protocol (their WireGuard implementation), and it’s fast. Not quite ExpressVPN fast in my testing from Tokyo, but we’re talking maybe 10-15% difference. For streaming? You won’t notice.

    Pros:

    • Excellent price-to-performance ratio, especially on 2-year plans
    • 100+ Japan servers means you always find a fast connection
    • Threat Protection Pro blocks ads, malware, and trackers
    • Double VPN and Onion over VPN for extra security
    • Works reliably with major streaming platforms in 2026
    • 10 simultaneous device connections

    Cons:

    • App can feel cluttered with all the features
    • Occasional slowdowns on US West Coast servers during peak hours
    • Auto-renewal price jumps significantly — set a calendar reminder

    My take: If you’re watching your budget (and let’s be real, Tokyo rent isn’t cheap), NordVPN gives you 90% of what ExpressVPN offers at roughly half the price. Solid choice.

    Surfshark — Unlimited Devices, Unbeatable Price

    Here’s who Surfshark is perfect for: the expat household. If you’ve got a partner, kids, multiple phones, laptops, tablets, a smart TV, and maybe a Japanese SIM card in a pocket WiFi device — Surfshark’s unlimited simultaneous connections mean you cover everything with one subscription.

    At around $2.49/month on their long-term plan, it’s absurdly cheap. And the quality doesn’t suffer as much as you’d expect for that price point. I recommended Surfshark to a friend who moved to Osaka last year, and he’s been perfectly happy streaming Premier League matches and accessing his Australian banking apps.

    Surfshark’s CleanWeb feature is their ad-blocker equivalent, and it works well on Japanese websites. Their Camouflage Mode (obfuscated servers) is also useful if you’re traveling to China for business from Japan — something plenty of expats here do regularly.

    Pros:

    • Unlimited simultaneous device connections — the whole family covered
    • Cheapest quality VPN for Japan in 2026
    • CleanWeb ad-blocker included
    • Works with Netflix, Disney+, Amazon Prime Video across regions
    • Camouflage Mode for trips to China
    • Dedicated Japan servers with decent speeds

    Cons:

    • Speeds can be inconsistent — some Japan servers are noticeably slower
    • Customer support response times are slower than ExpressVPN or NordVPN
    • Took a couple of tries to get BBC iPlayer working reliably

    My take: Incredible value. If you’re on a tight budget or need to cover lots of devices, it’s a no-brainer. Just don’t expect the buttery-smooth consistency of the premium options.

    ProtonVPN — For the Privacy-Conscious Expat

    ProtonVPN comes from the same Swiss company that makes ProtonMail, and their entire brand is built around privacy. If you’re the type of person who actually reads privacy policies (respect), this is your VPN.

    They’re headquartered in Switzerland, outside of the 14 Eyes surveillance alliance. They have a genuine no-logs policy that’s been independently audited and verified. And their Secure Core feature routes your traffic through privacy-friendly countries before sending it to the destination server — meaning even if someone compromises the exit server, they can’t trace it back to you.

    For Japan specifically, ProtonVPN has servers in both Tokyo and Osaka, which is great for speed optimization depending on where you live. The speeds are good — not the fastest on this list, but totally adequate for streaming and general use.

    Pros:

    • Best-in-class privacy and security credentials
    • Swiss jurisdiction, outside surveillance alliances
    • Secure Core architecture for extra protection
    • Open-source apps — fully transparent
    • Free tier available (limited but genuinely usable)
    • Tokyo and Osaka servers

    Cons:

    • Slower than ExpressVPN and NordVPN for streaming
    • Streaming support is less reliable — Netflix can be hit-or-miss
    • More expensive than NordVPN and Surfshark for comparable plans
    • Free tier doesn’t include Japan servers

    My take: If privacy is your top priority over streaming convenience, ProtonVPN is the answer. Their free tier is also the only one I’d actually recommend trying — most free VPNs are sketchy, but Proton is legit.

    Mullvad VPN — Dead Simple, Maximum Privacy

    Mullvad is the VPN for people who think ProtonVPN is too mainstream. It costs €5/month, no discounts, no upsells, no annual plans. You don’t even need an email address to sign up — they assign you a random account number. You can literally mail them cash in an envelope to pay. I’m not joking.

    For Japan, Mullvad has servers in Tokyo that perform well for general browsing and downloads. Where it falls short is streaming — Mullvad doesn’t prioritize unblocking streaming services, so if that’s your main use case, look elsewhere.

    Pros:

    • Ultimate privacy — no email, no personal info required
    • Simple, flat pricing with no tricks
    • WireGuard support with excellent security
    • Open-source and independently audited

    Cons:

    • Poor streaming unblocking capability
    • Smaller server network than competitors
    • No dedicated mobile apps as polished as competitors
    • No long-term savings — always €5/month

    My take: A niche pick for the privacy purists. If you just want to secure your connection on Japanese public WiFi and don’t care about Netflix, Mullvad is beautifully simple.

    VPN Buying Guide for Japan Expats: What Actually Matters

    Speed and Server Locations

    Japan has some of the fastest internet in the world. My fiber connection in Tokyo hits 800+ Mbps. The last thing you want is a VPN that bottlenecks that. Look for VPNs with servers in Japan (for local speed and accessing Japanese content from abroad) and in your home country (for accessing content from back home). The VPNs above all have strong coverage in both areas.

    Streaming Capability

    Let’s be honest — this is the #1 reason most expats get a VPN. You want to watch content from home. In 2026, streaming services have gotten aggressive about blocking VPNs, so you need a provider that actively works to stay ahead. ExpressVPN and NordVPN are the most reliable here. Surfshark is close behind.

    Security on Public WiFi

    Japan has free WiFi everywhere — train stations, convenience stores, cafes, airports. The problem? Most of it is completely unsecured. A VPN encrypts your connection so that nobody on that shared Lawson WiFi network can intercept your data. This isn’t paranoia; it’s basic digital hygiene.

    Banking and Financial Access

    This is the one that catches people off guard. Many US, UK, and Australian banks will flag or block logins from Japanese IP addresses. A VPN lets you connect through a server in your home country, making your bank think you’re still there. I use this literally every week with my US bank and Wise account.

    Protocol Support

    In 2026, you want WireGuard (or a proprietary implementation like NordLynx or Lightway). It’s faster and more efficient than older protocols like OpenVPN. All five VPNs listed above support modern protocols.

    Device Compatibility

    Make sure your VPN works on all your devices. At minimum, you need apps for Windows/Mac, iOS/Android, and ideally router support or smart TV apps. If you have a family, pay attention to the simultaneous connection limits.

    What About Free VPNs?

    I get asked this a lot. The short answer: don’t. Free VPNs (with the exception of ProtonVPN’s free tier) typically monetize your data, have terrible speeds, and don’t work with streaming services. The whole point of a VPN is privacy — using a free one that sells your browsing data defeats the purpose entirely. The paid options above start at just $2.49/month. That’s less than a can of Strong Zero.

    How to Set Up a VPN in Japan (5-Minute Guide)

    1. Choose your VPN from the recommendations above and sign up on their website
    2. Download the app on your devices (phone, laptop, tablet, etc.)
    3. Log in with your credentials
    4. Select a server — choose your home country for streaming home content, or a Japan server for security on local WiFi
    5. Enable the kill switch in settings (this cuts your internet if the VPN disconnects, preventing data leaks)
    6. Turn on split tunneling if available — this lets Japanese delivery apps and local services work normally while routing other traffic through the VPN

    Pro tip from experience: Set your VPN to auto-connect on untrusted networks. This means every time you connect to public WiFi in Japan (combini, Shinkansen, cafes), your VPN kicks in automatically. Set it once, forget about it forever.

    Frequently Asked Questions

    Is using a VPN legal in Japan?

    Yes, 100% legal. Japan has no laws against VPN use. Unlike China or Russia, there are no restrictions on VPN services in Japan. You can use them freely for privacy, security, and accessing geo-restricted content. That said, using a VPN to do something illegal doesn’t make it legal — the VPN itself is just a tool.

    Can I use a VPN to watch US Netflix from Japan?

    Yes, but not all VPNs work. Netflix actively blocks VPN IP addresses, so you need a provider that stays ahead of the game. In my testing in 2026, ExpressVPN, NordVPN, and Surfshark all reliably access US Netflix from Japan. I watch US Netflix several times a week using ExpressVPN without issues. The same applies to Hulu US, HBO Max, and other region-locked platforms.

    Will a VPN slow down my internet in Japan?

    Slightly, yes — but with Japan’s incredible internet speeds, you probably won’t notice. On my 800 Mbps fiber connection, ExpressVPN typically reduces speeds to around 300-500 Mbps, which is still insanely fast. For streaming in 4K, you only need about 25 Mbps, so there’s massive headroom. The only time I notice slowdown is connecting to distant servers (like US East Coast from Tokyo), and even then it’s perfectly usable.

    Do I need

    📋
    Get the Free Moving to Japan Checklist
    Visas, banking, health insurance, apartments — the full guide for expats, delivered to your inbox.


  • Wise Japan Review 2026: The Expat’s Go-To for International Transfers

    Wise Japan Review 2026: The Expat’s Go-To for International Transfers

    Affiliate Disclosure: This article contains affiliate links. If you sign up for Wise or purchase products through links on this page, I may earn a small commission at no extra cost to you. I only recommend services I personally use and trust. All opinions are my own based on years of real-world experience as an expat in Japan.

    💸
    Recommended Tool
    Wise — The Expat Standard for Money Transfers
    Wise uses the real mid-market exchange rate with low, transparent fees. Most expats in Japan use it for sending money home or paying bills. No hidden markups, no surprises.

    Open a Wise Account →Free to open · No monthly fees · Used by 16M+ people

    Introduction: Why Every Japan Expat Needs a Smart Money Transfer Solution

    Let me paint you a picture. It’s 2018, I’ve just landed in Tokyo, and I need to pay my first month’s rent plus deposit — roughly ¥400,000. My bank back home wants to charge me $45 in wire fees, plus a “small” exchange rate markup that turns out to be about 3% worse than the real rate. That’s over $100 gone before I’ve even bought my first konbini onigiri.

    That experience is exactly why I started using Wise (formerly TransferWise), and honestly, it’s been one of the best financial decisions I’ve made as an expat in Japan. But this isn’t going to be some fluffy, “everything is perfect” review. After using Wise almost weekly for over seven years in Japan, I’ve got a lot to share — the genuinely great stuff, the occasional frustrations, and the specific situations where it shines versus where you might want alternatives.

    Whether you’re sending money to Japan to cover rent, receiving your salary from overseas clients, converting currencies for travel, or just trying to avoid getting fleeced on exchange rates, this Wise Japan review covers everything you need to know in 2026.

    If you’re still in the planning stages of your move, check out our comprehensive moving to Japan checklist to make sure you’ve got all your bases covered — finances included.

    What Exactly Is Wise? A Quick Overview

    Wise is a financial technology company founded in 2011 by two Estonian expats who were tired of getting ripped off by traditional banks on international transfers. The core idea is beautifully simple: instead of sending your money through the traditional SWIFT banking network (which is slow, expensive, and opaque), Wise uses a peer-to-peer matching system and local bank networks to move money internationally at the real mid-market exchange rate.

    Here’s what Wise offers in 2026:

    • International money transfers to and from Japan at the real exchange rate
    • Multi-currency account that lets you hold 40+ currencies including JPY
    • Wise debit card for spending in Japan and abroad
    • Japanese yen account details so you can receive money as if you have a local account
    • Business accounts for freelancers and entrepreneurs in Japan
    • Wise Platform (formerly Wise for Banks) integrated into some Japanese financial services

    The key selling point? Transparency. Wise shows you exactly what fee you’re paying upfront, and they use the real exchange rate — the one you see on Google or Reuters — not some inflated bank rate with a hidden markup.

    Wise for Sending Money TO Japan

    This is probably the most common use case for new expats. You’ve got savings in your home country and need yen in Japan. Here’s how Wise performs:

    Speed

    In my experience, transfers from USD to JPY typically arrive within 1-2 business days. Transfers from GBP are often even faster — sometimes within hours. From EUR, expect about 1 business day. From AUD or CAD, it’s usually 1-2 days. The speed has actually improved significantly since I first started using Wise. Back in 2018, some transfers took 3-4 days. In 2026, the infrastructure is much more refined.

    Fees

    For a typical $1,000 USD to JPY transfer, you’re looking at roughly $4-7 in fees (the exact amount varies slightly based on how you fund the transfer). Bank transfers are cheapest, debit cards cost a bit more, and credit cards cost the most. Compare that to a traditional bank wire which might charge $25-50 plus a 2-4% exchange rate markup, and you start to see why Wise is so popular among expats.

    Real-World Example

    Last month, I transferred $2,000 to my Japanese bank account. Wise charged me $9.26 in fees and gave me the exact mid-market rate of ¥149.32 per dollar. My recipient got ¥297,413. Had I used my old bank, their rate would have been approximately ¥145.80 (a 2.4% markup), and the fee would have been $40. That’s a difference of over ¥10,000 — enough for a really nice dinner out in Tokyo.

    Wise for Sending Money FROM Japan

    This is where things get interesting — and where some people hit snags. If you’re an English teacher sending money home, a freelancer paying taxes in your home country, or just maintaining financial obligations overseas, you’ll need to send money out of Japan regularly.

    Wise supports JPY as a send currency, and the process works well. You can fund your transfer via Japanese bank transfer (using your Japanese bank account details), and the money gets converted and sent to your recipient abroad.

    The Japan-Specific Nuance

    One thing worth mentioning: funding a Wise transfer from Japan requires a Japanese bank transfer, which means you need a Japanese bank account. If you’re brand new to Japan and haven’t set one up yet, this won’t work immediately. Most Japan banks (Shinsei, Sony Bank, MUFG, SMBC, etc.) allow online transfers to Wise’s Japanese bank details without any issues, though some of the older regional banks might require a branch visit for the first transfer.

    The fees for sending JPY abroad are competitive — typically 0.5-1% of the transfer amount, which is substantially less than what GoRemit, the post office (Yucho), or traditional bank wires charge.

    The Wise Multi-Currency Account & Debit Card in Japan

    This is honestly where Wise has become indispensable for me in 2026. The multi-currency account lets you hold balances in Japanese yen, US dollars, euros, pounds, and dozens of other currencies simultaneously. Think of it as having multiple bank accounts in different countries, all accessible from one app.

    The Wise Card for Daily Use in Japan

    The Wise debit card works at most places in Japan that accept Mastercard. In 2026, cashless payment adoption in Japan has grown enormously compared to even a few years ago, so you can use the Wise card at convenience stores, supermarkets, restaurants, and train stations. You can also link it to mobile payment apps.

    When you pay in yen with the card and have a JPY balance, there’s no conversion fee — it just deducts from your yen balance. If you’re paying in yen but only have USD, it converts automatically at the mid-market rate with a small conversion fee.

    ATM Withdrawals

    You can withdraw cash from ATMs in Japan using the Wise card. Seven Bank ATMs (found in every 7-Eleven) and Japan Post ATMs tend to work most reliably. Wise gives you a free withdrawal allowance each month (currently around ¥30,000), after which there’s a small fee. For a country that still uses cash as much as Japan does, this is genuinely useful.

    Receiving Salary or Freelance Payments

    If you do freelance work for international clients, the Wise multi-currency account is a game-changer. You get local bank details in multiple countries (US routing number, UK sort code, EU IBAN, etc.), so your clients can pay you as if you were local. No international wire fees for them, and you receive the money in the original currency. Then you convert to yen whenever the rate looks good.

    I’ve used this extensively for freelance writing and consulting work, and it’s saved me thousands of dollars over the years compared to receiving international wire transfers into my Japanese bank account.

    Wise vs. The Competition in Japan (2026 Comparison)

    Wise isn’t the only game in town. Here’s how it stacks up against the other options Japan expats commonly use:

    Wise vs. Revolut

    Revolut has expanded its Japan offerings in recent years. Both offer multi-currency accounts and competitive rates. Revolut’s free tier has limited free currency exchange per month, after which a markup applies. Wise charges a small transparent fee on every conversion but always uses the real rate. For heavy users doing large transfers, Wise generally works out cheaper. For casual users doing small daily conversions, Revolut’s free allowance might edge ahead. My recommendation: have both.

    Wise vs. Sony Bank / Shinsei Bank

    These Japanese banks are popular with expats because they offer English-language services and reasonable foreign currency options. Sony Bank’s exchange rates are decent for a bank, and Shinsei offers free international ATM withdrawals. However, neither can match Wise’s exchange rate transparency or transfer speed for international transfers. Use a Japanese bank for domestic banking and salary deposits; use Wise for international transfers.

    Wise vs. PayPal

    Please, just don’t. PayPal’s exchange rate markup in Japan is typically 3-4% above the mid-market rate, and their fees for receiving international payments are steep. The only reason to use PayPal is if a client absolutely refuses to pay any other way.

    Wise vs. Traditional Bank Wires (SWIFT)

    Traditional bank wires through Japanese banks like MUFG or SMBC typically cost ¥3,000-7,500 per transfer plus a terrible exchange rate. The process involves filling out paperwork (sometimes in Japanese), and the money takes 3-5 business days. Wise beats traditional banks on every metric except for very large transfers (over $100,000) where you might want to consider a specialized FX broker.

    Pros and Cons of Wise for Japan Expats

    Pros

    • Transparent, real exchange rate — you always know exactly what you’re getting
    • Low, clearly stated fees — no hidden markups
    • Fast transfers — most arrive within 1-2 business days
    • Multi-currency account — perfect for holding different currencies
    • Excellent app and interface — available in English, easy to use
    • Wise card works well in Japan — accepted at most Mastercard terminals
    • Great for freelancers — local bank details in multiple countries
    • Solid customer support — available in English via chat
    • Regulated and trustworthy — licensed in multiple jurisdictions including Japan

    Cons

    • Not a full bank replacement — you still need a Japanese bank account for domestic life
    • ATM free withdrawal limit is modest — heavy cash users will hit the cap
    • Card isn’t accepted everywhere — some Japanese shops still only take cash or specific domestic cards
    • Large transfers may trigger verification delays — sending over $10,000 sometimes requires additional documentation
    • No Japanese-language support in-app for some features — though this has improved
    • Exchange rate fluctuations — not Wise’s fault, but JPY volatility means transfer timing matters a lot

    How to Set Up Wise in Japan: Step-by-Step Guide

    Getting started with Wise is straightforward, but there are a few Japan-specific things to keep in mind:

    Step 1: Create Your Account

    Sign up on the Wise website or download the app. You can register with your email address. Use your legal name exactly as it appears on your passport or residence card.

    Step 2: Verify Your Identity

    Wise will ask you to upload a photo ID. Your passport works globally, but if you’re already a Japan resident, your residence card (在留カード) also works. You’ll also need to take a selfie for verification. This process usually takes a few hours to a day.

    Step 3: Add Your Japanese Bank Account

    If you want to receive transfers in Japan, add your Japanese bank account details (bank name, branch code, account number, account holder name in katakana). Make sure the name matches exactly — Japanese banks are strict about this.

    Step 4: Make Your First Transfer

    Choose your send and receive currencies, enter the amount, review the fee and exchange rate, and confirm. If you’re sending from overseas, fund it via bank transfer or debit card. If sending from Japan, transfer yen to Wise’s Japanese bank details.

    Step 5: Order the Wise Card (Optional but Recommended)

    The physical card can be delivered to your Japanese address. It typically arrives within 1-2 weeks. Once activated, you can start using it at stores and ATMs throughout Japan.

    Pro Tips from Experience

    • Set up rate alerts for your currency pair — the JPY has been volatile, and timing your transfers can save significant money
    • Use bank transfers to fund your Wise account (not debit/credit cards) to minimize fees
    • Keep a small JPY balance in your Wise account for the card — it’s convenient for quick purchases
    • Download the app and enable notifications so you can track your transfers in real-time

    If you’re also looking for ways to stay connected when you first arrive, our Japan SIM card guide covers the best options for getting online immediately.

    Essential Accessories for Managing Money Abroad

    While Wise handles the digital side of your finances, there are a few physical items that make managing money in Japan easier:

    • RFID-blocking card wallet — Japan’s trains and convenience stores use contactless readers everywhere, and you don’t want accidental charges. Grab a good one here: RFID blocking card wallet on Amazon
    • Coin purse or coin wallet — Japan is still very much a cash society in many situations, and you will accumulate coins fast (¥1, ¥5, ¥10, ¥50, ¥100, ¥500): Japanese coin purse on Amazon
    • Travel document organizer — keep your residence card, bank cards, Wise card, and passport organized: Travel document organizer on Amazon

    Frequently Asked Questions

    Is Wise legal and safe to use in Japan?

    Yes, absolutely. Wise is registered as a funds transfer service provider in Japan and is regulated by the Kanto Local Finance Bureau. Your money is held in safeguarded accounts, meaning it’s protected even if something were to happen to Wise as a company. I’ve transferred well over ¥10 million through Wise over the years without a single issue. It’s as legitimate as it gets.

    Can I use Wise as my main bank account in Japan?

    Not entirely. While the Wise multi-currency account is incredibly useful, you’ll still need a Japanese bank account for things like salary deposits from a Japanese employer, paying rent via automatic bank transfer (自動振込), setting up utility payments, and paying national health insurance or pension. Think of Wise as your international money bridge, not your domestic bank replacement. For everything else Japan-specific, you’ll want a Shinsei Bank, Sony Bank, or MUFG account.

    How does Wise compare to using my home country’s bank card directly in Japan?

    Using your home bank’s debit or credit card in Japan typically incurs a foreign transaction fee of 1-3% plus an unfavorable exchange rate markup. Some premium cards waive foreign transaction fees, but you’re still usually getting a worse rate than Wise offers. For daily spending in Japan, loading yen onto your Wise account and using the Wise card is almost always cheaper. For one-off purchases, a no-foreign-fee credit card from home can work fine.

    What happens if the JPY exchange rate changes between when I initiate and complete a transfer?

    Wise locks in the exchange rate at the moment you create and fund your transfer. If you set up a transfer but don’t fund it immediately, the rate may be requoted when you do fund it. This is important given how much the yen has fluctuated in recent years. My advice: when you see a rate you’re happy with, fund the transfer immediately. You can also set up rate alerts in the Wise app to notify you when JPY hits your target rate.

    Can I use Wise to pay Japanese taxes or government fees?

    Not directly. Japanese tax payments and government fees need to come from a Japanese bank account (or be paid in cash/convenience store payment at konbini). However, you can use Wise to transfer money to your Japanese bank account, and then use that account to pay taxes. The process adds a step but still saves you money on the international transfer portion. If you’re a freelancer managing tax obligations in both Japan and your home country, Wise’s multi-currency account makes it much easier to keep funds organized.

    Conclusion: Is Wise Worth It for Japan Expats in 2026?

    After seven-plus years of using Wise in Japan, my verdict is simple: yes, it’s essential. Not perfect, not the answer to every financial need, but genuinely essential for anyone living in Japan who has financial ties to another country.

    The combination of transparent fees, real exchange rates, fast transfers, and the multi-currency account makes Wise the best overall option for international money management as a Japan expat. The card is a nice bonus for daily spending, and the ability to receive payments from international clients with local bank details is a massive advantage for freelancers and remote workers.

    Where Wise falls short — as a domestic Japanese bank replacement, for very large transfers where specialized FX brokers might offer better rates, or in situations where cash is the only option — there are complementary solutions. But as the foundation of your international money strategy in Japan, nothing I’ve found beats it in 2026.

    My recommendation: sign up for Wise before you move to Japan so it’s ready to go from day one. Set up rate alerts for your currency pair, order the card, and use it alongside a Japanese bank

    Open a Free Wise Account →

    Send money to Japan at the real exchange rate. No hidden fees.

    Affiliate link — we may earn a commission at no extra cost to you.

    📋
    Get the Free Moving to Japan Checklist
    Visas, banking, health insurance, apartments — the full guide for expats, delivered to your inbox.


  • Best SIM Card for Japan Expat: The Complete Guide for 2026

    Best SIM Card for Japan Expat: The Complete Guide for 2026

    Affiliate Disclosure: This article contains affiliate links. If you purchase through these links, I may earn a small commission at no extra cost to you. I only recommend products and services I’ve personally used or thoroughly researched. Your support helps keep this site running — thank you!

    Introduction: Why Your SIM Card Choice Actually Matters in Japan

    Let me paint you a picture. You’ve just landed at Narita, you’re jet-lagged, you need to message your new landlord, pull up Google Maps to find your apartment, and maybe check if your bank transfer went through. And your phone? Dead weight without a Japanese SIM card or eSIM.

    I’ve been through this exact scenario, and I’ve watched dozens of friends fumble through it too. Here’s the thing most “best SIM card” articles won’t tell you: the best SIM for a tourist visiting Japan for two weeks is completely different from what you need as an expat actually living here.

    As an expat in 2026, you need reliable monthly service, reasonable data limits (or unlimited), the ability to get a real Japanese phone number (critical for everything from bank accounts to delivery services), and ideally a plan that doesn’t require a two-year blood oath with a carrier. Japan’s mobile landscape has changed dramatically in recent years with the rise of MVNOs (budget carriers) and eSIM technology, making it way more foreigner-friendly than it was even a few years ago.

    In this guide, I’m breaking down the actual best SIM card options for Japan expats in 2026 — not tourists, not business travelers, but people who are building a life here. I’ll cover everything from temporary arrival SIMs to long-term plans, pricing, coverage, English support, and the stuff nobody warns you about. Let’s dive in.

    Quick Comparison: Top SIM Cards for Japan Expats in 2026

    Provider Best For Monthly Cost (Approx.) Data Phone Number English Support Contract Required
    Rakuten Mobile Best overall for expats ¥1,078–¥3,278 Up to unlimited Yes Yes No
    Ahamo (by NTT Docomo) Best coverage & simplicity ¥2,970 20GB (100GB option) Yes Limited No
    LINEMO Best budget option ¥990–¥2,728 3GB–20GB Yes Limited No
    IIJmio Best for data-light users ¥850–¥2,000 2GB–20GB Yes Yes No
    Mobal Best for day-one arrivals ¥1,980+ Varies Yes Yes (native) No
    Ubigi / Airalo (eSIM) Best temporary arrival eSIM $5–$15/week 1GB–10GB+ No Yes No

    Rakuten Mobile — Best Overall SIM for Japan Expats

    If I had to pick one recommendation for a new expat in 2026, it’s Rakuten Mobile. Full stop. Here’s why: it’s the most foreigner-friendly major carrier in Japan, the pricing is genuinely excellent, there’s no contract lock-in, and their app and support are available in English.

    Rakuten uses a tiered pricing model called “Rakuten Saikyo Plan” — you pay based on how much data you actually use each month. Under 3GB? You pay ¥1,078. Under 20GB? ¥2,178. Over 20GB, it’s ¥3,278 for unlimited data. That unlimited tier is a genuine game-changer, especially compared to what the big three carriers charge.

    You get a real Japanese phone number (070/080/090), free domestic calls through the Rakuten Link app, and you can sign up online or at a Rakuten store with your residence card and passport. The signup process takes about 30 minutes in-store, and staff are generally accustomed to helping foreign residents.

    Pros:

    • No contract — cancel anytime
    • Unlimited data at ¥3,278/month is unbeatable value
    • English app and customer support
    • Free domestic calls via Rakuten Link app
    • eSIM supported — activate instantly
    • Easy signup with residence card

    Cons:

    • Coverage in rural areas and underground can be spotty (uses partner networks to fill gaps)
    • Rakuten Link call quality is occasionally inconsistent
    • The Rakuten ecosystem can feel overwhelming with all its cross-promotions

    One insider tip: Rakuten frequently runs campaigns where you get thousands of Rakuten Points back for signing up. Time your registration with one of these campaigns and you could essentially get your first few months free.

    Ahamo (by NTT Docomo) — Best for Reliable Coverage Everywhere

    If you’re moving somewhere rural — Hokkaido, Tohoku, Shikoku, or anywhere outside the major metros — Ahamo is your best friend. It runs on NTT Docomo’s network, which has the most comprehensive coverage in Japan. Mountains, countryside, remote islands — Docomo reaches places other carriers simply don’t.

    Ahamo keeps things dead simple: ¥2,970/month for 20GB of data, a Japanese phone number, and 5 minutes of free domestic calling per call. Need more data? The 100GB “Ahamo Daisei” plan is ¥4,950/month. No contract, no nonsense.

    The catch? Ahamo is online-only. There are no dedicated Ahamo stores, and while you can get limited support at Docomo shops (for a fee), the primary support channel is their website and chat. English support is minimal, though the signup process itself is manageable with a browser translator.

    Pros:

    • Best network coverage in Japan (Docomo network)
    • Simple, transparent pricing
    • No contract required
    • Includes 20GB international roaming in 91 countries
    • Reliable speeds even during peak hours

    Cons:

    • Online-only support (mostly in Japanese)
    • No truly unlimited data option
    • 5-minute call limit means you’ll pay extra for longer calls
    • Signup requires a Japanese credit card or bank account

    LINEMO — Best Budget SIM for Expats Who Don’t Use Much Data

    LINEMO, SoftBank’s online-only budget brand, is perfect if you’re a light data user or if you spend most of your time on WiFi at home and work. Their mini plan gives you 3GB for just ¥990/month — that’s less than a fancy coffee at a Tokyo café.

    The 20GB plan at ¥2,728/month is also competitive. Both plans include a Japanese phone number, and here’s the killer feature for expat life in Japan: LINE usage doesn’t count against your data cap. Since LINE is essentially Japan’s primary messaging app (your landlord, coworkers, friends — everyone uses it), this is a genuinely meaningful perk.

    Pros:

    • Incredibly affordable mini plan at ¥990/month
    • LINE data doesn’t count toward your cap
    • SoftBank network — solid urban coverage
    • No contract
    • eSIM supported

    Cons:

    • Online-only (Japanese-heavy interface)
    • Limited English support
    • 3GB can disappear fast if you stream or use maps heavily
    • No unlimited option

    IIJmio — Best MVNO for Flexible, Affordable Plans

    IIJmio is one of Japan’s oldest and most respected MVNOs (Mobile Virtual Network Operators). They offer a range of plans from 2GB to 20GB, with some of the lowest prices in the Japanese market. The 15GB plan at around ¥1,800/month is a sweet spot for many expats.

    What sets IIJmio apart is flexibility. You can choose between Docomo and au (KDDI) networks, mix voice and data-only SIMs, share data across multiple SIMs (great for couples or if you have a tablet), and even get family discounts. Their English support has improved significantly, and their website has a decent English section.

    Pros:

    • Very competitive pricing across all tiers
    • Choice of Docomo or au network
    • Data sharing between SIMs
    • English support available
    • Long track record of reliability

    Cons:

    • Speeds can slow during peak hours (typical MVNO limitation)
    • Signup process can be confusing for newcomers
    • No unlimited data plan
    • Physical stores are limited

    Mobal — Best for Getting Connected Before or On Arrival Day

    Here’s the scenario where Mobal shines: you haven’t arrived in Japan yet, or you just got here and need a working phone number immediately. Mobal is a UK/Japan company specifically designed for foreigners, and they’ll ship a SIM card to your home country before you leave, or you can pick one up at the airport.

    You get a real Japanese phone number from day one — before you even have a residence card. This is huge because most other carriers require a residence card to sign up. Mobal plans start at around ¥1,980/month, and while they’re not the cheapest long-term option, the convenience factor for the first weeks in Japan is invaluable.

    Many expats use Mobal as a bridge: get connected immediately, then switch to Rakuten or Ahamo once you have your residence card and bank account sorted.

    Pros:

    • Can order before arriving in Japan
    • No residence card required for initial signup
    • Full English support (native speakers)
    • Real Japanese phone number
    • Simple, transparent plans

    Cons:

    • More expensive than Japanese MVNOs
    • Data allowances are less generous for the price
    • Better as a temporary solution than a long-term plan

    Check out portable WiFi devices on Amazon if you need backup connectivity during your first weeks: Japan pocket WiFi devices on Amazon.

    Airalo & Ubigi — Best eSIM Options for Immediate Connectivity

    If your phone supports eSIM (most phones from 2022 onward do), grabbing a travel eSIM from Airalo or Ubigi before your flight is the fastest way to have data the moment you land. You can literally activate it while waiting for your luggage at baggage claim.

    These are data-only eSIMs — no Japanese phone number — so they’re not a long-term solution. But for the first few days while you’re apartment hunting, setting up your bank account, and getting your bearings, they’re a lifesaver. Plans typically range from $5 for 1GB to $15-25 for 10GB+, valid for 7-30 days.

    I always recommend having one of these as your “arrival plan” while you sort out a proper Japanese SIM. You can check out eSIM-compatible devices here: Unlocked eSIM smartphones on Amazon.

    Pros:

    • Instant activation — no store visits needed
    • Affordable short-term data
    • Works alongside your existing SIM (dual SIM)
    • Full English interface

    Cons:

    • No Japanese phone number
    • Data only — no voice calls
    • Not suitable as a long-term solution
    • Requires eSIM-compatible device

    Buying Guide: How to Choose the Right Japan Expat SIM Card

    Step 1: Assess Your Timeline

    Are you already in Japan with a residence card? Or are you still planning your move? This determines your options immediately. Without a residence card, you’re limited to Mobal, travel eSIMs, or prepaid tourist SIMs. With a residence card, the full range of carriers opens up to you.

    Step 2: Check Your Phone Compatibility

    Make sure your phone is unlocked and supports Japanese frequency bands. Most recent iPhones and Samsung Galaxy phones work perfectly. If you’re bringing a phone from overseas, verify it supports bands used by your chosen carrier. Phones sold in Japan are now sold unlocked by law, so buying a new phone here is also a viable option. Browse unlocked phones here: Unlocked dual SIM smartphones on Amazon.

    Step 3: Determine Your Data Needs

    Be honest with yourself. If you work from home on WiFi and mainly use mobile data for maps and messaging, 3-5GB is plenty. If you stream music on your commute, watch YouTube on breaks, and use your phone as a hotspot occasionally, 15-20GB is the sweet spot. If you work remotely from cafés or don’t have home WiFi yet, go unlimited with Rakuten.

    Step 4: Consider Whether You Need a Phone Number

    You absolutely do. A Japanese phone number (not a data-only SIM) is essential for expat life. You need it for bank accounts, credit card applications, apartment contracts, delivery services, restaurant reservations, and government registrations. Data-only SIMs and travel eSIMs are temporary bridges, not solutions.

    Step 5: Think About Payment Methods

    Some carriers require a Japanese credit card or bank account. If you’ve just arrived, you might not have these yet. Rakuten Mobile accepts some foreign credit cards, and Mobal accepts international payment methods. Planning your payment setup alongside your SIM card choice can save headaches. Setting up a Wise account for Japan early can help bridge this gap.

    My Recommended Strategy for New Expats

    1. Before departure: Download an Airalo or Ubigi eSIM for arrival-day data
    2. Week 1: If you need a phone number immediately, get Mobal
    3. Weeks 2-4: Once you have your residence card and bank account, sign up for Rakuten Mobile or Ahamo as your permanent provider
    4. Cancel your temporary Mobal/eSIM plan

    While you’re setting up your digital life, don’t forget to sort out a VPN for Japan to access content from back home and protect your privacy on public WiFi.

    Important Things Nobody Tells You About Japan SIM Cards

    Your My Number card matters. Starting in recent years, more carriers are asking for My Number verification during signup. Get your My Number card sorted at city hall as early as possible — it smooths out everything from phone contracts to bank accounts.

    MNP (Mobile Number Portability) works great. When you want to switch carriers, you can keep your Japanese phone number. Japan’s MNP system is efficient, and most switches can happen same-day. Don’t feel locked into your first choice forever.

    Avoid the big three carriers’ main plans. NTT Docomo, au (KDDI), and SoftBank’s flagship plans are expensive — often ¥7,000-10,000/month — and designed for people who want in-store handholding. Their budget sub-brands (Ahamo, povo, LINEMO) use the exact same networks at a fraction of the price.

    Free WiFi in Japan isn’t as widespread as you’d think. Despite Japan’s tech reputation, public WiFi is inconsistent. Train stations and convenience stores have it, but it’s often slow and requires registration. Having solid mobile data matters more here than in many other countries.

    For a complete overview of everything you need to set up when arriving, check out our

    Get the Free Moving to Japan Checklist
    Visas, banking, health insurance, apartments — the full guide for expats, delivered to your inbox.